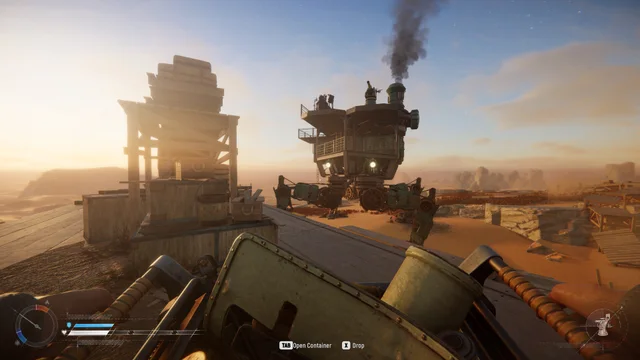
Featured Game Hub
SAND Raiders of Sophie Guide: Beginner, Loot, Trampler
A launch-window expedition hub for first Voyage routes, extraction recovery, Trampler build checks, and loot decisions before you sell or overstay.

Popular Checks
4 quick linksUse the first-run checklist for food, fuel, ammo, cargo space, and a clean exit rule.
Extraction Recover ExtractionFix radio tower calls, Storm Dive greed, and runs where the player or Trampler is still outside.
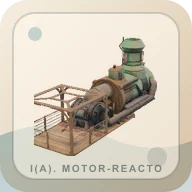
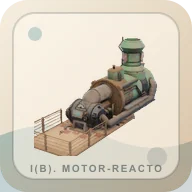
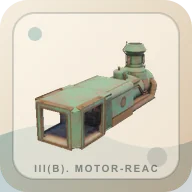
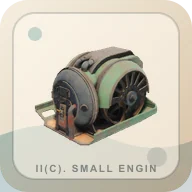
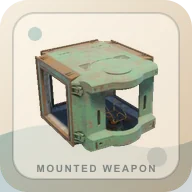
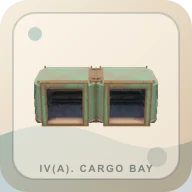
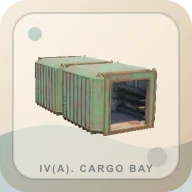
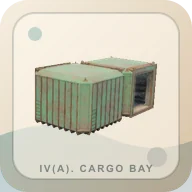
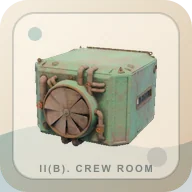
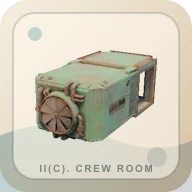
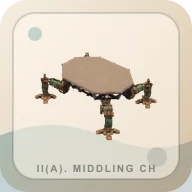
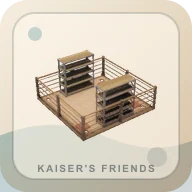
Trampler Check Trampler BuildSearch chassis, cargo, crew, reactor, engines, and mounted weapons before a longer route.
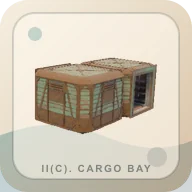
Loot Search Loot DecisionDecide whether an item should be kept, sold, delivered, crafted, or routed to extraction.
All Guides
4 pagesTools & Databases
Use this SAND Raiders of Sophie guide hub to choose the right next step: first Voyage route, extraction recovery, Trampler readiness, or loot decisions before selling contract and crafting items.
Version focusEarly Access launch window
Official pageOpen official page
Expedition Board
Pick The Problem In Front Of You
Start from the moment you are actually in: launching, leaving, rebuilding the Trampler, or deciding what not to sell.Pack food, fuel, one usable weapon, matching ammo, cargo space, and an exit rule.
Trying to leave Open ExtractionRecover when the radio call, Storm pressure, parking, or exit timer starts to break the run.
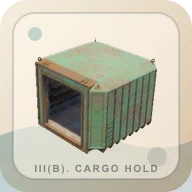
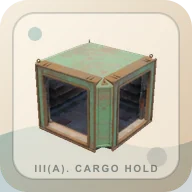
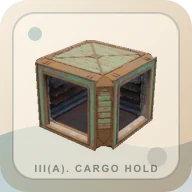
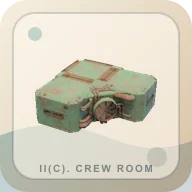
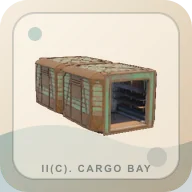
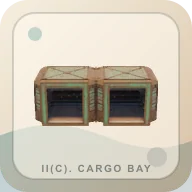
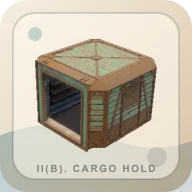
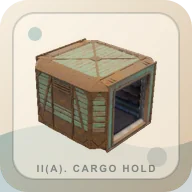
Changing the base Check TramplerFind the pressure point before moving rare cargo: chassis, cargo, power, crew, armor, or turrets.
Sorting cargo Search LootPause before selling rare-looking items, delivery cargo, ammo inputs, and Trampler parts.
Released Jun 22, 2026; exact routes can shift during Early Access.
Learn cargo, food, weapons, and extraction before pushing Storm Dive.
Expect busy routes, contested exits, and quick balance changes during the launch window.
Key Cargo Checks
Items to recognize before the sell screen
Do not sell the last Coral Chunk until the current route, contract, and workbench need are clear.
Separate contract cargo from sell cargo before opening the shop or hand-in screen.

Check ammo needs before turning Scrap Metal into cash.
If your guns are underfed, keep Scrapped Ammo out of the sell pile.
Separate contract cargo from sell cargo before opening the shop or hand-in screen.
Separate contract cargo from sell cargo before opening the shop or hand-in screen.
If the run already has a Black Box, stop widening the route and plan the exit.

Keep a reserve stack in one known storage spot.
Keep one stack in a known storage spot until the Armament route is stable.

Do not convert or sell every food item before a long extraction attempt.
Refill before leaving camp; an empty Trampler turns a good run into a rescue problem.
Route Picker
What are you trying to finish?
learning the loop without betting the whole base
- Load food, fuel reserve, a simple gun, matching ammo, and one empty cargo lane.
- Use Voyage first so the run teaches looting, storage, and extraction before Storm pressure.
- Stop after the first useful objective or full cargo pocket.
- Extract the player and the Trampler together; do not turn the exit into another loot stop.
Black Box, Coral Chunk, Mechanical Parts, Threads, or delivery stacks
- Search the item in the finder before selling anything.
- Reserve cargo space for the delivery item before side loot.
- Once the target is on board, start routing toward extraction.
- If the Trampler is damaged or low on power, keep the contract item and leave the rest.
higher reward routes after the basic loop feels stable
- Bring more food, shells, repair margin, and a clearer exit rule than in Voyage.
- Treat smoke, distant engines, and a full cargo bay as reasons to leave.
- Keep the walking base moving; a parked Trampler is an easy target.
- Cut the run short once the objective is secured.
new chassis, cargo bay, turret deck, reactor, or crew layout
- Test one new system at a time instead of rebuilding the whole vehicle.
- Check cargo, power, crew seats, and turret ammo before leaving.
- Run a short route and come back before trusting the build with rare loot.
- Move to Storm only after the build survives a simple extraction.
Launch Check
First Voyage Checklist
Failure Recovery
When the exit plan breaks
If the target item or contract cargo is already on board, every extra crate is now an exit risk.
Personal loot can be replaced; losing the walking base turns one bad fight into a session reset.
Use the radio tower or exit route, watch approach lanes, and park deliberately instead of drifting into the zone.
Storm Dive loot is a bonus only after power, crew, and the exit timer are under control.
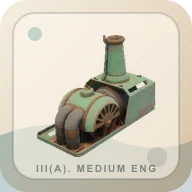
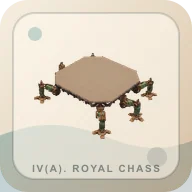
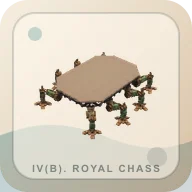
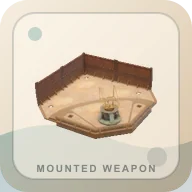
Build Readiness
Choose the pressure point before rebuilding
Use this in camp: filter the build problem, save the modules involved, then test one change on a short Voyage.
Search every Trampler row in the readiness board.
Make sure the solo or squad route has enough control space before launch.
- Solves
- Crew control
- Watch for
- Fit check
- Test with
- 1x2
- Safe move
- Change one part at a time and check exit movement after the change.
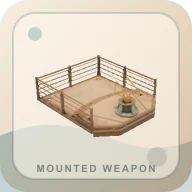
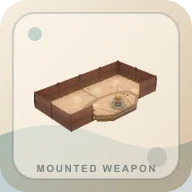
Mount only after shells and firing lanes match the route.
- Solves
- Sustained fire
- Watch for
- Mounted ammo pressure.
- Test with
- 1x1
- Safe move
- Count shells before launch and avoid fights that do not protect the objective.
Mount only after shells and firing lanes match the route.
- Solves
- Sustained fire
- Watch for
- Mounted ammo pressure.
- Test with
- 1x1
- Safe move
- Count shells before launch and avoid fights that do not protect the objective.
Add weapons only after cargo and power are not already failing.
- Solves
- Weapon mount
- Watch for
- Fit check
- Test with
- 2x2
- Safe move
- Change one part at a time and check exit movement after the change.
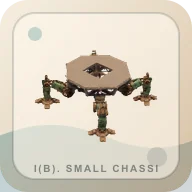
Pick the chassis around crew size, cargo goal, and how often you need to turn around under pressure.
- Solves
- Build footprint
- Watch for
- Footprint pressure
- Test with
- 4x3
- Safe move
- Run a short extraction test before switching the main build.
Pick the chassis around crew size, cargo goal, and how often you need to turn around under pressure.
- Solves
- Build footprint
- Watch for
- Footprint pressure
- Test with
- 5x3
- Safe move
- Run a short extraction test before switching the main build.
Pick the chassis around crew size, cargo goal, and how often you need to turn around under pressure.
- Solves
- Build footprint
- Watch for
- Footprint pressure
- Test with
- 4x6
- Safe move
- Run a short extraction test before switching the main build.
Pick the chassis around crew size, cargo goal, and how often you need to turn around under pressure.
- Solves
- Build footprint
- Watch for
- Footprint pressure
- Test with
- 3x4
- Safe move
- Run a short extraction test before switching the main build.
Pick the chassis around crew size, cargo goal, and how often you need to turn around under pressure.
- Solves
- Build footprint
- Watch for
- Footprint pressure
- Test with
- 3x5
- Safe move
- Run a short extraction test before switching the main build.
Pick the chassis around crew size, cargo goal, and how often you need to turn around under pressure.
- Solves
- Build footprint
- Watch for
- Footprint pressure
- Test with
- 5x5
- Safe move
- Run a short extraction test before switching the main build.
Pick the chassis around crew size, cargo goal, and how often you need to turn around under pressure.
- Solves
- Build footprint
- Watch for
- Footprint pressure
- Test with
- 4x4
- Safe move
- Run a short extraction test before switching the main build.
Pick the chassis around crew size, cargo goal, and how often you need to turn around under pressure.
- Solves
- Build footprint
- Watch for
- Footprint pressure
- Test with
- 3x3
- Safe move
- Run a short extraction test before switching the main build.
Check power before adding heavy loot or extra weapon decks.
- Solves
- Movement and power
- Watch for
- Power pressure
- Test with
- 1x3
- Safe move
- Leave with power margin, not only full cargo.
Check power before adding heavy loot or extra weapon decks.
- Solves
- Movement and power
- Watch for
- Power pressure
- Test with
- 2x2
- Safe move
- Leave with power margin, not only full cargo.
Check power before adding heavy loot or extra weapon decks.
- Solves
- Movement and power
- Watch for
- Power pressure
- Test with
- 2x2
- Safe move
- Leave with power margin, not only full cargo.

Check power before adding heavy loot or extra weapon decks.
- Solves
- Movement and power
- Watch for
- Power pressure
- Test with
- 2x2
- Safe move
- Leave with power margin, not only full cargo.
Check power before adding heavy loot or extra weapon decks.
- Solves
- Movement and power
- Watch for
- Power pressure
- Test with
- 1x3
- Safe move
- Leave with power margin, not only full cargo.
Check power before adding heavy loot or extra weapon decks.
- Solves
- Movement and power
- Watch for
- Power pressure
- Test with
- 1x3
- Safe move
- Leave with power margin, not only full cargo.
Check power before adding heavy loot or extra weapon decks.
- Solves
- Movement and power
- Watch for
- Power pressure
- Test with
- 1x3
- Safe move
- Leave with power margin, not only full cargo.
Check power before adding heavy loot or extra weapon decks.
- Solves
- Movement and power
- Watch for
- Power pressure
- Test with
- 1x1
- Safe move
- Leave with power margin, not only full cargo.
Check power before adding heavy loot or extra weapon decks.
- Solves
- Movement and power
- Watch for
- Power pressure
- Test with
- 1x2
- Safe move
- Leave with power margin, not only full cargo.
Pick the chassis around crew size, cargo goal, and how often you need to turn around under pressure.
- Solves
- Build footprint
- Watch for
- Footprint pressure
- Test with
- 5x5
- Safe move
- Run a short extraction test before switching the main build.
Pick the chassis around crew size, cargo goal, and how often you need to turn around under pressure.
- Solves
- Build footprint
- Watch for
- Footprint pressure
- Test with
- 4x6
- Safe move
- Run a short extraction test before switching the main build.
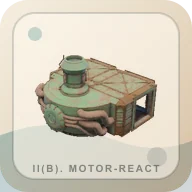
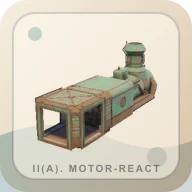
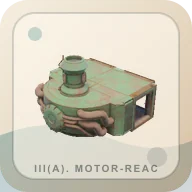
Test the module on a short route before trusting it with rare cargo.
- Solves
- Damage control
- Watch for
- Weight and repair pressure
- Test with
- 1x1
- Safe move
- Change one part at a time and check exit movement after the change.
Test the module on a short route before trusting it with rare cargo.
- Solves
- Damage control
- Watch for
- Weight and repair pressure
- Test with
- 3x1
- Safe move
- Change one part at a time and check exit movement after the change.
Test the module on a short route before trusting it with rare cargo.
- Solves
- Damage control
- Watch for
- Weight and repair pressure
- Test with
- 2x1
- Safe move
- Change one part at a time and check exit movement after the change.
Test the module on a short route before trusting it with rare cargo.
- Solves
- Damage control
- Watch for
- Weight and repair pressure
- Test with
- 2x1
- Safe move
- Change one part at a time and check exit movement after the change.
Test the module on a short route before trusting it with rare cargo.
- Solves
- Damage control
- Watch for
- Weight and repair pressure
- Test with
- 1x1
- Safe move
- Change one part at a time and check exit movement after the change.
Test the module on a short route before trusting it with rare cargo.
- Solves
- Damage control
- Watch for
- Weight and repair pressure
- Test with
- 1x1
- Safe move
- Change one part at a time and check exit movement after the change.
Test the module on a short route before trusting it with rare cargo.
- Solves
- Damage control
- Watch for
- Weight and repair pressure
- Test with
- 1x1
- Safe move
- Change one part at a time and check exit movement after the change.
Test the module on a short route before trusting it with rare cargo.
- Solves
- Damage control
- Watch for
- Weight and repair pressure
- Test with
- 1x1
- Safe move
- Change one part at a time and check exit movement after the change.
Test the module on a short route before trusting it with rare cargo.
- Solves
- Damage control
- Watch for
- Weight and repair pressure
- Test with
- 1x1
- Safe move
- Change one part at a time and check exit movement after the change.
Test the module on a short route before trusting it with rare cargo.
- Solves
- Damage control
- Watch for
- Weight and repair pressure
- Test with
- 1x1
- Safe move
- Change one part at a time and check exit movement after the change.
Mount only after shells and firing lanes match the route.
- Solves
- Sustained fire
- Watch for
- Mounted ammo pressure.
- Test with
- 1x1
- Safe move
- Count shells before launch and avoid fights that do not protect the objective.
Mount only after shells and firing lanes match the route.
- Solves
- Sustained fire
- Watch for
- Mounted ammo pressure.
- Test with
- 1x1
- Safe move
- Count shells before launch and avoid fights that do not protect the objective.
Test the module on a short route before trusting it with rare cargo.
- Solves
- Module fit
- Watch for
- Fit check
- Test with
- 1x1
- Safe move
- Change one part at a time and check exit movement after the change.

Make sure the solo or squad route has enough control space before launch.
- Solves
- Crew control
- Watch for
- Crew routing
- Test with
- 1x1+
- Safe move
- Change one part at a time and check exit movement after the change.
Keep one cargo lane for contract items and one lane for sell cargo.
- Solves
- Storage and loot routing
- Watch for
- Cargo pressure
- Test with
- 1x2
- Safe move
- Reserve space before looting so contract items do not get left behind.
Keep one cargo lane for contract items and one lane for sell cargo.
- Solves
- Storage and loot routing
- Watch for
- Cargo pressure
- Test with
- 1x2
- Safe move
- Reserve space before looting so contract items do not get left behind.
Keep one cargo lane for contract items and one lane for sell cargo.
- Solves
- Storage and loot routing
- Watch for
- Cargo pressure
- Test with
- 1x2
- Safe move
- Reserve space before looting so contract items do not get left behind.
Keep one cargo lane for contract items and one lane for sell cargo.
- Solves
- Storage and loot routing
- Watch for
- Cargo pressure
- Test with
- 1x1
- Safe move
- Reserve space before looting so contract items do not get left behind.
Keep one cargo lane for contract items and one lane for sell cargo.
- Solves
- Storage and loot routing
- Watch for
- Cargo pressure
- Test with
- 1x1
- Safe move
- Reserve space before looting so contract items do not get left behind.
Keep one cargo lane for contract items and one lane for sell cargo.
- Solves
- Storage and loot routing
- Watch for
- Cargo pressure
- Test with
- 1x1
- Safe move
- Reserve space before looting so contract items do not get left behind.
Test the module on a short route before trusting it with rare cargo.
- Solves
- Damage control
- Watch for
- Fit check
- Test with
- 1x1
- Safe move
- Change one part at a time and check exit movement after the change.
Test the module on a short route before trusting it with rare cargo.
- Solves
- Damage control
- Watch for
- Weight and repair pressure
- Test with
- 1x1
- Safe move
- Change one part at a time and check exit movement after the change.
Test the module on a short route before trusting it with rare cargo.
- Solves
- Damage control
- Watch for
- Weight and repair pressure
- Test with
- 1x1
- Safe move
- Change one part at a time and check exit movement after the change.
Test the module on a short route before trusting it with rare cargo.
- Solves
- Damage control
- Watch for
- Weight and repair pressure
- Test with
- 1x1
- Safe move
- Change one part at a time and check exit movement after the change.
Make sure the solo or squad route has enough control space before launch.
- Solves
- Crew control
- Watch for
- Crew routing
- Test with
- 1x2
- Safe move
- Change one part at a time and check exit movement after the change.
Make sure the solo or squad route has enough control space before launch.
- Solves
- Crew control
- Watch for
- Crew routing
- Test with
- 1x2
- Safe move
- Change one part at a time and check exit movement after the change.
Make sure the solo or squad route has enough control space before launch.
- Solves
- Crew control
- Watch for
- Crew routing
- Test with
- 2x1
- Safe move
- Change one part at a time and check exit movement after the change.
Test the module on a short route before trusting it with rare cargo.
- Solves
- Module fit
- Watch for
- Fit check
- Test with
- 1x1
- Safe move
- Change one part at a time and check exit movement after the change.
Make sure the solo or squad route has enough control space before launch.
- Solves
- Crew control
- Watch for
- Crew routing
- Test with
- 1x1
- Safe move
- Change one part at a time and check exit movement after the change.
Make sure the solo or squad route has enough control space before launch.
- Solves
- Crew control
- Watch for
- Crew routing
- Test with
- 2x2
- Safe move
- Change one part at a time and check exit movement after the change.
Mount only after shells and firing lanes match the route.
- Solves
- Sustained fire
- Watch for
- Mounted ammo pressure.
- Test with
- 1x1
- Safe move
- Count shells before launch and avoid fights that do not protect the objective.

Mount only after shells and firing lanes match the route.
- Solves
- Sustained fire
- Watch for
- Mounted ammo pressure.
- Test with
- 1x1
- Safe move
- Count shells before launch and avoid fights that do not protect the objective.

Mount only after shells and firing lanes match the route.
- Solves
- Sustained fire
- Watch for
- Mounted ammo pressure.
- Test with
- 2x1
- Safe move
- Count shells before launch and avoid fights that do not protect the objective.
Mount only after shells and firing lanes match the route.
- Solves
- Sustained fire
- Watch for
- Mounted ammo pressure.
- Test with
- 2x1
- Safe move
- Count shells before launch and avoid fights that do not protect the objective.
Test the module on a short route before trusting it with rare cargo.
- Solves
- Module fit
- Watch for
- Fit check
- Test with
- 1x1
- Safe move
- Change one part at a time and check exit movement after the change.
Test the module on a short route before trusting it with rare cargo.
- Solves
- Module fit
- Watch for
- Fit check
- Test with
- 1x2
- Safe move
- Change one part at a time and check exit movement after the change.
Pick the chassis around crew size, cargo goal, and how often you need to turn around under pressure.
- Solves
- Build footprint
- Watch for
- Footprint pressure
- Test with
- 2x4
- Safe move
- Run a short extraction test before switching the main build.
Pick the chassis around crew size, cargo goal, and how often you need to turn around under pressure.
- Solves
- Build footprint
- Watch for
- Footprint pressure
- Test with
- 3x3
- Safe move
- Run a short extraction test before switching the main build.

Pick the chassis around crew size, cargo goal, and how often you need to turn around under pressure.
- Solves
- Build footprint
- Watch for
- Footprint pressure
- Test with
- 5x3
- Safe move
- Run a short extraction test before switching the main build.

Pick the chassis around crew size, cargo goal, and how often you need to turn around under pressure.
- Solves
- Build footprint
- Watch for
- Footprint pressure
- Test with
- 3x5
- Safe move
- Run a short extraction test before switching the main build.
Pick the chassis around crew size, cargo goal, and how often you need to turn around under pressure.
- Solves
- Build footprint
- Watch for
- Footprint pressure
- Test with
- 4x4
- Safe move
- Run a short extraction test before switching the main build.
Pick the chassis around crew size, cargo goal, and how often you need to turn around under pressure.
- Solves
- Build footprint
- Watch for
- Footprint pressure
- Test with
- 4x3
- Safe move
- Run a short extraction test before switching the main build.
Pick the chassis around crew size, cargo goal, and how often you need to turn around under pressure.
- Solves
- Build footprint
- Watch for
- Footprint pressure
- Test with
- 3x4
- Safe move
- Run a short extraction test before switching the main build.
Test the module on a short route before trusting it with rare cargo.
- Solves
- Module fit
- Watch for
- Fit check
- Test with
- 1x1
- Safe move
- Change one part at a time and check exit movement after the change.
Test the module on a short route before trusting it with rare cargo.
- Solves
- Module fit
- Watch for
- Fit check
- Test with
- 3x1
- Safe move
- Change one part at a time and check exit movement after the change.
Test the module on a short route before trusting it with rare cargo.
- Solves
- Module fit
- Watch for
- Fit check
- Test with
- 2x1
- Safe move
- Change one part at a time and check exit movement after the change.
Test the module on a short route before trusting it with rare cargo.
- Solves
- Module fit
- Watch for
- Fit check
- Test with
- 2x1
- Safe move
- Change one part at a time and check exit movement after the change.
Test the module on a short route before trusting it with rare cargo.
- Solves
- Module fit
- Watch for
- Fit check
- Test with
- 1x1
- Safe move
- Change one part at a time and check exit movement after the change.
Test the module on a short route before trusting it with rare cargo.
- Solves
- Module fit
- Watch for
- Fit check
- Test with
- 1x1
- Safe move
- Change one part at a time and check exit movement after the change.
Test the module on a short route before trusting it with rare cargo.
- Solves
- Module fit
- Watch for
- Fit check
- Test with
- 1x1
- Safe move
- Change one part at a time and check exit movement after the change.
Test the module on a short route before trusting it with rare cargo.
- Solves
- Module fit
- Watch for
- Fit check
- Test with
- 1x2
- Safe move
- Change one part at a time and check exit movement after the change.
Make sure the solo or squad route has enough control space before launch.
- Solves
- Crew control
- Watch for
- Crew routing
- Test with
- 1x1+
- Safe move
- Change one part at a time and check exit movement after the change.
Test the module on a short route before trusting it with rare cargo.
- Solves
- Module fit
- Watch for
- Fit check
- Test with
- 1x1
- Safe move
- Change one part at a time and check exit movement after the change.
Keep one cargo lane for contract items and one lane for sell cargo.
- Solves
- Storage and loot routing
- Watch for
- Cargo pressure
- Test with
- 1x2
- Safe move
- Reserve space before looting so contract items do not get left behind.
Keep one cargo lane for contract items and one lane for sell cargo.
- Solves
- Storage and loot routing
- Watch for
- Cargo pressure
- Test with
- 1x2
- Safe move
- Reserve space before looting so contract items do not get left behind.
Keep one cargo lane for contract items and one lane for sell cargo.
- Solves
- Storage and loot routing
- Watch for
- Cargo pressure
- Test with
- 1x2
- Safe move
- Reserve space before looting so contract items do not get left behind.
Keep one cargo lane for contract items and one lane for sell cargo.
- Solves
- Storage and loot routing
- Watch for
- Cargo pressure
- Test with
- 1x1
- Safe move
- Reserve space before looting so contract items do not get left behind.
Keep one cargo lane for contract items and one lane for sell cargo.
- Solves
- Storage and loot routing
- Watch for
- Cargo pressure
- Test with
- 1x1
- Safe move
- Reserve space before looting so contract items do not get left behind.

Keep one cargo lane for contract items and one lane for sell cargo.
- Solves
- Storage and loot routing
- Watch for
- Cargo pressure
- Test with
- 1x1
- Safe move
- Reserve space before looting so contract items do not get left behind.
Keep one cargo lane for contract items and one lane for sell cargo.
- Solves
- Storage and loot routing
- Watch for
- Cargo pressure
- Test with
- 1x1
- Safe move
- Reserve space before looting so contract items do not get left behind.
Keep one cargo lane for contract items and one lane for sell cargo.
- Solves
- Storage and loot routing
- Watch for
- Cargo pressure
- Test with
- 1x1
- Safe move
- Reserve space before looting so contract items do not get left behind.
Keep one cargo lane for contract items and one lane for sell cargo.
- Solves
- Storage and loot routing
- Watch for
- Cargo pressure
- Test with
- 1x1
- Safe move
- Reserve space before looting so contract items do not get left behind.
Keep one cargo lane for contract items and one lane for sell cargo.
- Solves
- Storage and loot routing
- Watch for
- Cargo pressure
- Test with
- 1x1
- Safe move
- Reserve space before looting so contract items do not get left behind.
Keep one cargo lane for contract items and one lane for sell cargo.
- Solves
- Storage and loot routing
- Watch for
- Cargo pressure
- Test with
- 1x1
- Safe move
- Reserve space before looting so contract items do not get left behind.
Keep one cargo lane for contract items and one lane for sell cargo.
- Solves
- Storage and loot routing
- Watch for
- Cargo pressure
- Test with
- 1x1
- Safe move
- Reserve space before looting so contract items do not get left behind.
Test the module on a short route before trusting it with rare cargo.
- Solves
- Module fit
- Watch for
- Fit check
- Test with
- 1x1
- Safe move
- Change one part at a time and check exit movement after the change.
Test the module on a short route before trusting it with rare cargo.
- Solves
- Module fit
- Watch for
- Fit check
- Test with
- 1x1
- Safe move
- Change one part at a time and check exit movement after the change.
Test the module on a short route before trusting it with rare cargo.
- Solves
- Module fit
- Watch for
- Fit check
- Test with
- 1x2
- Safe move
- Change one part at a time and check exit movement after the change.
Test the module on a short route before trusting it with rare cargo.
- Solves
- Module fit
- Watch for
- Fit check
- Test with
- 1x1
- Safe move
- Change one part at a time and check exit movement after the change.
Test the module on a short route before trusting it with rare cargo.
- Solves
- Module fit
- Watch for
- Fit check
- Test with
- 2x1
- Safe move
- Change one part at a time and check exit movement after the change.
Test the module on a short route before trusting it with rare cargo.
- Solves
- Module fit
- Watch for
- Fit check
- Test with
- 2x1
- Safe move
- Change one part at a time and check exit movement after the change.
Test the module on a short route before trusting it with rare cargo.
- Solves
- Module fit
- Watch for
- Fit check
- Test with
- 1x1
- Safe move
- Change one part at a time and check exit movement after the change.
No matching Trampler part. Clear the search or switch Build problem back to all build checks.
Quick Loot Check
Search the items players regret selling early
Use this at storage or the sell screen: search the item, choose the decision you are making, then save anything that should not become cash yet.
Search every visible cargo decision in this tool.
Turn a weird coral find into progress instead of loose cash.
- Next move
- Keep the first stack, then decide between Coral Dust, Mechanical Parts, or a contract hand-in.
- Do not regret
- Do not sell the last Coral Chunk until the current route, contract, and workbench need are clear.
- Useful when
- Coral runs, early contracts, and resource conversion.
- Route hint
- Check valuables safes and coral routes, then extract before the cargo run gets greedy.
- Delivery
- 50 x Coral Chunk -> 1000 x Crowns -> 20 crowns per item
- Craft use
- Coral Dust, Mechanical Parts, Coral Dust
- Likely stop
- Valuables Safe, Valuables Container Tier 1 Premium Set 1, Valuables Container Tier 1 Premium Set 2
Decide whether Fabric Scraps should be delivered before it becomes cash.
- Next move
- Hold the delivery amount, check the timer if listed, then extract instead of widening the run.
- Do not regret
- Separate contract cargo from sell cargo before opening the shop or hand-in screen.
- Useful when
- Delivery runs and clean extraction planning.
- Route hint
- Reserve the delivery stack, then leave once the cargo is secure. Reward: 1000 x Crowns.
- Delivery
- 250 x Fabric Scraps -> 1000 x Crowns -> 4 crowns per item
- Craft use
- Fabric, Fabric, 12 GA Ammo
- Likely stop
- Crate of Shells, Shells Container Tier 1 Premium Set 1, Shells Container Tier 1 Premium Set 2
Feed early ammunition and basic weapons.
- Next move
- Keep a starter craft reserve, then sell only surplus after the ammo box is healthy.
- Do not regret
- Check ammo needs before turning Scrap Metal into cash.
- Useful when
- First Voyage ammo, cheap weapons, and workbench recovery.
- Route hint
- Parts crates and starter looting loops are the safest early route.
- Delivery
- 250 x Scrap Metal -> 1000 x Crowns -> 4 crowns per item
- Craft use
- 8x21 mm Ammo, 11x54 mm Ammo, 8x21 mm Ammo
- Likely stop
- Parts Crate, Parts Crate
Turn junk rounds into usable ammunition.
- Next move
- Save it for 8x21mm, 9x42mm, 12 GA, and turret shell crafting before selling.
- Do not regret
- If your guns are underfed, keep Scrapped Ammo out of the sell pile.
- Useful when
- Loadout recovery and post-fight restock.
- Route hint
- Loot crates, extract, then craft ammo in batches that match your actual weapons.
- Delivery
- 250 x Scrapped Ammo -> 1000 x Crowns -> 4 crowns per item
- Craft use
- 8x21 mm Ammo, 12 GA Ammo, 70 mm Shell
- Likely stop
- Weapon Crate, Weapon Crate
Decide whether Threads should be delivered before it becomes cash.
- Next move
- Hold the delivery amount, check the timer if listed, then extract instead of widening the run.
- Do not regret
- Separate contract cargo from sell cargo before opening the shop or hand-in screen.
- Useful when
- Delivery runs and clean extraction planning.
- Route hint
- Reserve the delivery stack, then leave once the cargo is secure. Reward: 1000 x Mechanical Parts.
- Delivery
- 250 x Threads -> 1000 x Mechanical Parts
- Craft use
- Fabric, Fabric, Old Smuggler's Jacket
- Likely stop
- Food Crate, Food Container Tier 1 Premium Set 1, Food Container Tier 2 Premium Set 1
Decide whether Mechanical Parts should be delivered before it becomes cash.
- Next move
- Hold the delivery amount, check the timer if listed, then extract instead of widening the run.
- Do not regret
- Separate contract cargo from sell cargo before opening the shop or hand-in screen.
- Useful when
- Delivery runs and clean extraction planning.
- Route hint
- Reserve the delivery stack, then leave once the cargo is secure. Reward: 200 x Pneumatic Parts.
- Delivery
- 1000 x Mechanical Parts -> 200 x Pneumatic Parts
- Likely stop
- Parts Crate, Suspicious Pile of Sand, Buried Treasure Tier 1 Set 1
Handle a high-value objective without losing the payout.
- Next move
- Treat it as a contract item first, then extract cleanly before chasing side loot.
- Do not regret
- If the run already has a Black Box, stop widening the route and plan the exit.
- Useful when
- Timed contracts and focused extraction runs.
- Route hint
- Run the objective, secure the box, and leave room for a failed extraction reset.
- Delivery
- 1 x Black Box -> 2000 x Crowns -> 2000 crowns per item
- Craft use
- Computing Module, Computing Module, Computing Module
Use Pneumatic Parts as a crafting input instead of loose cargo.
- Next move
- Keep enough for Pristine 40 mm Autocannon Kit and Pristine 40 mm Autocannon Kit; sell only the surplus.
- Do not regret
- Keep a reserve stack in one known storage spot.
- Useful when
- Crafting Pristine 40 mm Autocannon Kit or Pristine 40 mm Autocannon Kit.
- Route hint
- Start with Parts Crate or Suspicious Pile of Sand and stop when cargo space or exit safety gets tight.
- Craft use
- Pristine 40 mm Autocannon Kit, Pristine 40 mm Autocannon Kit, Pristine 80 mm Naval Cannon Kit
- Likely stop
- Parts Crate, Suspicious Pile of Sand, Buried Treasure Tier 1 Set 1
Move from found guns into planned loadouts.
- Next move
- Save enough for early weapon crafting before selling or scattering parts across storage.
- Do not regret
- Keep one stack in a known storage spot until the Armament route is stable.
- Useful when
- Upgrading personal weapons after safer Voyage runs.
- Route hint
- Farm weapons crates and parts crates, then craft only around the next route.
- Craft use
- M82 Rifle, Blitz 10R Pistol, M82 Rifle
- Likely stop
- Ironclad Loot Box, Ironclad Loot Box 40mm Set 1, Ironclad Loot Box 40mm Set 2
Keep the crew alive during longer dune routes.
- Next move
- Carry enough for the route and refill the Trampler before Storm Dive.
- Do not regret
- Do not convert or sell every food item before a long extraction attempt.
- Useful when
- Beginner runs, long looting loops, and crew recovery.
- Route hint
- Food crates and safe starter routes are enough for early sessions.
- Likely stop
- Food Crate, Ironclad Loot Box, Suspicious Pile of Sand
No matching item. Clear search, widen the use filter, or save the item until the current save proves it is spare cargo.
Guide Map
Choose the route that fits your save.
Start with the problem in front of you, then move sideways into the next useful guide.
Start and Extract
First Voyage loadouts, short-route habits, radio tower calls, Storm Dive stop rules, and failed-exit recovery.
For your first SAND Raiders of Sophie run, choose Voyage, pack food, fuel, one simple weapon, matching ammo, one empty cargo lane, and a clear exit rule. Leave after the first useful objective instead of turning the route into a full-map loot sweep.
Extraction SAND Raiders of Sophie Extraction Guide: Radio Tower & Storm DiveSAND Raiders of Sophie extraction is successful only when both the player and the Trampler leave. Start the exit plan once target cargo is on board, protect the walking base during radio tower calls, and abandon side loot when Storm Dive pressure turns the run against you.
Build the Walking Base
Trampler chassis, crew space, cargo pressure, engine margin, turret ammo, and short tests before rare cargo.
Protect Loot Decisions
Keep-first items, contract cargo, crafting inputs, sell lanes, and item checks before the shop screen.
Before selling SAND Raiders of Sophie loot, search the item. Keep the first copy when it can feed a contract, craft, research unlock, ammo reserve, or Trampler build; sell only surplus once the finder shows no pressure.
Extraction SAND Raiders of Sophie Extraction Guide: Radio Tower & Storm DiveSAND Raiders of Sophie extraction is successful only when both the player and the Trampler leave. Start the exit plan once target cargo is on board, protect the walking base during radio tower calls, and abandon side loot when Storm Dive pressure turns the run against you.
Use this SAND: Raiders of Sophie guide hub when you need to choose the next safe move before a run. Pick the problem in front of you, open the matching guide, and keep the route short until the Trampler, cargo hold, food, fuel, and exit plan are all under control.
Last checked: June 30, 2026. SAND is in Early Access, so exact item roles, module comfort, and route safety can change. Use the tools here as run planning help, then confirm costly choices in your current save before spending rare parts or selling the last copy of an item.
Pick Your Next Run
| If your problem is… | Open this | What the page helps you do |
|---|---|---|
| You have not completed a clean first Voyage | Beginner Guide | Pack food, fuel, a simple weapon, matching ammo, and an exit rule without overloading the route |
| You keep losing runs at the exit | Extraction Guide | Recover failed radio tower calls, stop Storm Dive greed, and get player plus Trampler out together |
| Your walking base feels strong in camp but bad in the field | Trampler Guide | Check chassis, cargo, crew space, power, engines, turret ammo, and short-route testing |
| You do not know whether to keep or sell an item | Loot Guide | Search items before selling, delivering, crafting, researching, or routing to extraction |
That order is deliberate. SAND is not only a loot game; it is a risk-management game built around a walking base. A new player who reads an item list first still may not know when to leave. A new player who learns Voyage, exit rules, Trampler pressure, and keep-first decisions can survive long enough for the item decisions to matter.
The Short Version
Start with Voyage, not Storm Dive. Load food, a fuel reserve, a simple gun, matching ammo, and at least one empty cargo lane. Pick one target before launch. When that target is on board, stop widening the route and begin thinking about extraction.
The Trampler is not background storage. It is the run. If it is low on power, missing shells, overloaded with side loot, or parked badly during an exit call, the player inventory stops mattering. Most bad early runs are not lost because the player failed to find loot; they are lost because the route kept growing after the good cargo was already secured.
The loot finder exists for the moment after a run, when the sell screen is tempting and the cargo bay looks messy. Search rare-looking items, contract cargo, crafting inputs, ammo ingredients, and Trampler materials before turning them into cash. Keep the first copy when the item has a delivery, crafting, research, or build pressure attached.
What SAND Asks From A New Player
SAND combines PvPvE extraction with a mobile base, so the first skill is not aim or perfect map memory. The first skill is knowing when a run is already good enough.
Voyage is the best early training mode because it teaches the loop without asking you to solve every system at once. You learn how much food a route needs, how quickly cargo fills, which weapons drain the ammo box, and how stressful extraction becomes once the Trampler is damaged or badly parked.
Storm Dive should come later. It can offer better rewards, but it also punishes vague plans. If the goal is “grab anything useful,” the route never ends. If the goal is “find one contract item, keep power margin, and leave after the first clean exit chance,” Storm Dive becomes a plan instead of a gamble.
Run Rules Worth Keeping
| Rule | Why it matters |
|---|---|
| Pick the exit rule before the first loot stop | The moment cargo gets exciting is when players start ignoring the timer, the Trampler position, and enemy approach lanes |
| Save the first copy of strange items | Coral Chunk, Black Box, Mechanical Parts, Threads, ammo inputs, and rare valuables can be more useful than early cash |
| Pair weapons with ammo before launch | A stronger weapon with no reserve is worse than a simpler gun you can keep fed |
| Test one Trampler change at a time | Rebuilding chassis, cargo, crew, power, and turrets together makes it hard to know which change broke the route |
| Leave once the target is secure | A run that extracts with the contract item beats a run that dies with a perfect hold |
How To Use The Cargo Strip And Tools
The key cargo strip is a quick recognition check for items that can waste a session if they are sold too quickly. If you see Black Box, Coral Chunk, Mechanical Parts, Scrapped Ammo, Threads, energy rods, or rare shells in the hold, pause before opening the shop. Search the item, check the safe move, then decide whether it belongs in contract cargo, craft reserve, Trampler storage, or the sell lane.
Use the hub as a loop rather than a reading order:
- Learn the first route.
- Learn how to leave.
- Build the walking base around the route.
- Protect item decisions after the run.
- Return here when the next session has a different problem.
The important habit is not memorizing every item name. It is recognizing when a piece of cargo changes the run. A strange icon in the hold, a rare material name, or a part tied to power, ammo, cargo, or mounted weapons should slow the sell decision down until the finder gives you a safer next move.
Good First Session Route
Use this as a starting plan if you are opening SAND for the first time today:
| Step | Action | Stop rule |
|---|---|---|
| 1 | Open the Beginner Guide and mark the First Voyage checklist | Do not launch until food, power, ammo, cargo, and exit are covered |
| 2 | Run Voyage with one main target | Stop looting when the target is on board or cargo starts forcing bad choices |
| 3 | Extract the player and Trampler together | Do not jump out for one more crate once the exit sequence begins |
| 4 | Search questionable items in the Loot Guide | Keep the first copy when a delivery, crafting, or build pressure appears |
| 5 | Open the Trampler Guide before changing the base | Test one new system on a short route |
When To Move Beyond Beginner Routes
Move into the extraction guide when the first Voyage is no longer the hard part. The signs are simple: you can pack without forgetting food or ammo, you know where cargo will go, and you are losing more value to exits than to looting. At that point, radio tower calls, Storm Dive stop rules, and failed-exit recovery are the next bottleneck.
Move into the Trampler guide when your walking base feels like the run’s limit. That might mean not enough cargo space, not enough power, too much turret ammo pressure, poor crew routing, or a chassis that feels awkward under fire. The Trampler page is the most SAND-specific page here because it treats the walking base as a build decision, not a background vehicle.
Move into the loot guide when the sell screen becomes dangerous. If you see Black Box, Coral Chunk, Mechanical Parts, Pneumatic Parts, Threads, High-Grade Gunpowder, Scrapped Ammo, Weapon Parts, rare shells, or a strange valuable, search before selling. The finder will not make every decision final forever, but it will tell you which items deserve a pause before cash.
FAQ
What SAND Raiders of Sophie guide should I open first?
Open the beginner guide if you have not finished a clean Voyage yet. After that, use extraction, Trampler, and loot pages based on the problem blocking your next run.
Is SAND Raiders of Sophie in Early Access?
Yes. Treat exact values, module balance, and route comfort as Early Access details that can move with updates.
What is the most important SAND habit?
Choose the exit rule before the first loot stop. A full cargo hold is not a win until both the player and the Trampler leave.
Should I use the loot finder every run?
Use it whenever an item looks rare, appears in a contract, feeds crafting, or might be needed for Trampler progress. Safe cash should be the last decision, not the first.