Guides
SAND Raiders of Sophie Loot Guide: Keep, Sell, Craft
Quick Answer
Before selling SAND Raiders of Sophie loot, search the item. Keep the first copy when it can feed a contract, craft, research unlock, ammo reserve, or Trampler build; sell only surplus once the finder shows no pressure.
Keep / Sell / Deliver / Craft Finder
Decide What Not To Sell
Use this at the cargo hold or sell screen when an item might be contract cargo, craft reserve, ammo input, Trampler material, or safe cash.Search anything rare, technical, contract-shaped, or tied to ammo and Trampler upgrades.
Each result says whether to keep first, deliver, craft, research, route to extraction, or sell surplus.
Saved rows survive refresh, so you can sort storage, compare route needs, and reset after cleanup.
Released Jun 22, 2026; exact routes can shift during Early Access.
Learn cargo, food, weapons, and extraction before pushing Storm Dive.
Expect busy routes, contested exits, and quick balance changes during the launch window.
Loot Finder
Keep, sell, deliver, or craft?
Use this at storage or the sell screen: search the item, choose the decision you are making, then save anything that should not become cash yet.
Search every visible cargo decision in this tool.
Turn a weird coral find into progress instead of loose cash.
- Next move
- Keep the first stack, then decide between Coral Dust, Mechanical Parts, or a contract hand-in.
- Do not regret
- Do not sell the last Coral Chunk until the current route, contract, and workbench need are clear.
- Useful when
- Coral runs, early contracts, and resource conversion.
- Route hint
- Check valuables safes and coral routes, then extract before the cargo run gets greedy.
- Delivery
- 50 x Coral Chunk -> 1000 x Crowns -> 20 crowns per item
- Craft use
- Coral Dust, Mechanical Parts, Coral Dust
- Likely stop
- Valuables Safe, Valuables Container Tier 1 Premium Set 1, Valuables Container Tier 1 Premium Set 2
Decide whether Fabric Scraps should be delivered before it becomes cash.
- Next move
- Hold the delivery amount, check the timer if listed, then extract instead of widening the run.
- Do not regret
- Separate contract cargo from sell cargo before opening the shop or hand-in screen.
- Useful when
- Delivery runs and clean extraction planning.
- Route hint
- Reserve the delivery stack, then leave once the cargo is secure. Reward: 1000 x Crowns.
- Delivery
- 250 x Fabric Scraps -> 1000 x Crowns -> 4 crowns per item
- Craft use
- Fabric, Fabric, 12 GA Ammo
- Likely stop
- Crate of Shells, Shells Container Tier 1 Premium Set 1, Shells Container Tier 1 Premium Set 2

Feed early ammunition and basic weapons.
- Next move
- Keep a starter craft reserve, then sell only surplus after the ammo box is healthy.
- Do not regret
- Check ammo needs before turning Scrap Metal into cash.
- Useful when
- First Voyage ammo, cheap weapons, and workbench recovery.
- Route hint
- Parts crates and starter looting loops are the safest early route.
- Delivery
- 250 x Scrap Metal -> 1000 x Crowns -> 4 crowns per item
- Craft use
- 8x21 mm Ammo, 11x54 mm Ammo, 8x21 mm Ammo
- Likely stop
- Parts Crate, Parts Crate
Turn junk rounds into usable ammunition.
- Next move
- Save it for 8x21mm, 9x42mm, 12 GA, and turret shell crafting before selling.
- Do not regret
- If your guns are underfed, keep Scrapped Ammo out of the sell pile.
- Useful when
- Loadout recovery and post-fight restock.
- Route hint
- Loot crates, extract, then craft ammo in batches that match your actual weapons.
- Delivery
- 250 x Scrapped Ammo -> 1000 x Crowns -> 4 crowns per item
- Craft use
- 8x21 mm Ammo, 12 GA Ammo, 70 mm Shell
- Likely stop
- Weapon Crate, Weapon Crate
Decide whether Threads should be delivered before it becomes cash.
- Next move
- Hold the delivery amount, check the timer if listed, then extract instead of widening the run.
- Do not regret
- Separate contract cargo from sell cargo before opening the shop or hand-in screen.
- Useful when
- Delivery runs and clean extraction planning.
- Route hint
- Reserve the delivery stack, then leave once the cargo is secure. Reward: 1000 x Mechanical Parts.
- Delivery
- 250 x Threads -> 1000 x Mechanical Parts
- Craft use
- Fabric, Fabric, Old Smuggler's Jacket
- Likely stop
- Food Crate, Food Container Tier 1 Premium Set 1, Food Container Tier 2 Premium Set 1
Decide whether Mechanical Parts should be delivered before it becomes cash.
- Next move
- Hold the delivery amount, check the timer if listed, then extract instead of widening the run.
- Do not regret
- Separate contract cargo from sell cargo before opening the shop or hand-in screen.
- Useful when
- Delivery runs and clean extraction planning.
- Route hint
- Reserve the delivery stack, then leave once the cargo is secure. Reward: 200 x Pneumatic Parts.
- Delivery
- 1000 x Mechanical Parts -> 200 x Pneumatic Parts
- Likely stop
- Parts Crate, Suspicious Pile of Sand, Buried Treasure Tier 1 Set 1
Use 12 GA Ammo as a crafting input instead of loose cargo.
- Next move
- Keep enough for 12 GA Shotgun Slug; sell only the surplus.
- Do not regret
- Keep a reserve stack in one known storage spot.
- Useful when
- Crafting 12 GA Shotgun Slug.
- Route hint
- Start with Suspicious Pile of Sand or Weapon Crate and stop when cargo space or exit safety gets tight.
- Craft use
- 12 GA Shotgun Slug
- Likely stop
- Suspicious Pile of Sand, Weapon Crate, Buried Treasure Tier 1 Set 4

Use EB Zseb Revolver as a crafting input instead of loose cargo.
- Next move
- Keep enough for EB "Bantam" Revolver and EB "Bantam" Revolver; sell only the surplus.
- Do not regret
- Keep a reserve stack in one known storage spot.
- Useful when
- Crafting EB "Bantam" Revolver or EB "Bantam" Revolver.
- Route hint
- Start with Weapon Crate or Buried Treasure Tier 2 Set 4 and stop when cargo space or exit safety gets tight.
- Craft use
- EB "Bantam" Revolver, EB "Bantam" Revolver
- Likely stop
- Weapon Crate, Buried Treasure Tier 2 Set 4, Ghoul Range Set 4

Use Fabric as a crafting input instead of loose cargo.
- Next move
- Keep enough for Time Bomb and HG-6 Contact Grenade; sell only the surplus.
- Do not regret
- Keep a reserve stack in one known storage spot.
- Useful when
- Crafting Time Bomb or HG-6 Contact Grenade.
- Route hint
- Start with Medical Container Tier 2 Premium Set 1 or Medical Container Tier 3 Premium Set 1 and stop when cargo space or exit safety gets tight.
- Craft use
- Time Bomb, HG-6 Contact Grenade, Armor-Piercing Rocket
- Likely stop
- Medical Container Tier 2 Premium Set 1, Medical Container Tier 3 Premium Set 1, Medical Container Tier 2 Basic Set 1
Handle a high-value objective without losing the payout.
- Next move
- Treat it as a contract item first, then extract cleanly before chasing side loot.
- Do not regret
- If the run already has a Black Box, stop widening the route and plan the exit.
- Useful when
- Timed contracts and focused extraction runs.
- Route hint
- Run the objective, secure the box, and leave room for a failed extraction reset.
- Delivery
- 1 x Black Box -> 2000 x Crowns -> 2000 crowns per item
- Craft use
- Computing Module, Computing Module, Computing Module

Decide whether Scrapped Ammunition should be delivered before it becomes cash.
- Next move
- Hold the delivery amount, check the timer if listed, then extract instead of widening the run.
- Do not regret
- Separate contract cargo from sell cargo before opening the shop or hand-in screen.
- Useful when
- Delivery runs and clean extraction planning.
- Route hint
- Reserve the delivery stack, then leave once the cargo is secure. Reward: 1000 x Crowns.
- Delivery
- 250 x Scrapped Ammunition -> 1000 x Crowns -> 4 crowns per item
- Likely stop
- Weapons Container Tier 1 Premium Set 1, Weapons Container Tier 1 Premium Set 2, Weapons Container Tier 1 Premium Set 3

Protect Time Bomb until the unlock path is clear.
- Next move
- Check Tier II before spending this item elsewhere.
- Do not regret
- Check the unlock path before spending the last copy.
- Useful when
- Workbench restock and route prep.
- Route hint
- Start with Suspicious Pile of Sand or Suspicious Pile of Sand and stop when cargo space or exit safety gets tight.
- Likely stop
- Suspicious Pile of Sand, Suspicious Pile of Sand
Use Alloy Steel as a crafting input instead of loose cargo.
- Next move
- Keep enough for Pristine 40 mm Autocannon Kit and Pristine 40 mm Autocannon Kit; sell only the surplus.
- Do not regret
- Keep a reserve stack in one known storage spot.
- Useful when
- Crafting Pristine 40 mm Autocannon Kit or Pristine 40 mm Autocannon Kit.
- Route hint
- Start with Ironclad Loot Box or Ironclad Alloy Loot Box and stop when cargo space or exit safety gets tight.
- Craft use
- Pristine 40 mm Autocannon Kit, Pristine 40 mm Autocannon Kit, Pristine 80 mm Naval Cannon Kit
- Likely stop
- Ironclad Loot Box, Ironclad Alloy Loot Box, Ironclad Loot Box
Use Gunpowder as a crafting input instead of loose cargo.
- Next move
- Keep enough for Time Bomb and HG-6 Contact Grenade; sell only the surplus.
- Do not regret
- Keep a reserve stack in one known storage spot.
- Useful when
- Crafting Time Bomb or HG-6 Contact Grenade.
- Route hint
- Start with Resource Container Tier 2 Premium Set 1 or Resource Container Tier 2 Premium Set 2 and stop when cargo space or exit safety gets tight.
- Craft use
- Time Bomb, HG-6 Contact Grenade, Armor-Piercing Rocket
- Likely stop
- Resource Container Tier 2 Premium Set 1, Resource Container Tier 2 Premium Set 2, Resource Container Tier 3 Premium Set 1
Use High Grade Gunpowder as a crafting input instead of loose cargo.
- Next move
- Keep enough for 11x54 mm Ammo and 11x54 mm Ammo; sell only the surplus.
- Do not regret
- Keep a reserve stack in one known storage spot.
- Useful when
- Crafting 11x54 mm Ammo or 11x54 mm Ammo.
- Route hint
- Start with Resource Container Tier 3 Premium Set 1 or Resource Container Tier 3 Premium Set 2 and stop when cargo space or exit safety gets tight.
- Craft use
- 11x54 mm Ammo, 11x54 mm Ammo
- Likely stop
- Resource Container Tier 3 Premium Set 1, Resource Container Tier 3 Premium Set 2, Resource Container Tier 3 Standard Set 1
Use Metal Rods as a crafting input instead of loose cargo.
- Next move
- Keep enough for M82 Rifle and Blitz 10R Pistol; sell only the surplus.
- Do not regret
- Keep a reserve stack in one known storage spot.
- Useful when
- Crafting M82 Rifle or Blitz 10R Pistol.
- Route hint
- Start with Shells Container Tier 2 Premium Set 1 or Shells Container Tier 2 Premium Set 2 and stop when cargo space or exit safety gets tight.
- Craft use
- M82 Rifle, Blitz 10R Pistol, Pepper Mill Shotgun
- Likely stop
- Shells Container Tier 2 Premium Set 1, Shells Container Tier 2 Premium Set 2, Shells Container Tier 2 Premium Set 3

Use Optic Lenses as a crafting input instead of loose cargo.
- Next move
- Keep enough for 1874s Petros Sniper Rifle and 1874s/sd Petros Sniper Rifle (Silenced); sell only the surplus.
- Do not regret
- Keep a reserve stack in one known storage spot.
- Useful when
- Crafting 1874s Petros Sniper Rifle or 1874s/sd Petros Sniper Rifle (Silenced).
- Route hint
- Start with Medical Container Tier 3 Premium Set 1 or Medical Container Tier 3 Standard Set 1 and stop when cargo space or exit safety gets tight.
- Craft use
- 1874s Petros Sniper Rifle, 1874s/sd Petros Sniper Rifle (Silenced), 1874s Petros Sniper Rifle
- Likely stop
- Medical Container Tier 3 Premium Set 1, Medical Container Tier 3 Standard Set 1, Ghoul Melee Set 4

Use Pneumatic Parts as a crafting input instead of loose cargo.
- Next move
- Keep enough for Pristine 40 mm Autocannon Kit and Pristine 40 mm Autocannon Kit; sell only the surplus.
- Do not regret
- Keep a reserve stack in one known storage spot.
- Useful when
- Crafting Pristine 40 mm Autocannon Kit or Pristine 40 mm Autocannon Kit.
- Route hint
- Start with Parts Crate or Suspicious Pile of Sand and stop when cargo space or exit safety gets tight.
- Craft use
- Pristine 40 mm Autocannon Kit, Pristine 40 mm Autocannon Kit, Pristine 80 mm Naval Cannon Kit
- Likely stop
- Parts Crate, Suspicious Pile of Sand, Buried Treasure Tier 1 Set 1
Move from found guns into planned loadouts.
- Next move
- Save enough for early weapon crafting before selling or scattering parts across storage.
- Do not regret
- Keep one stack in a known storage spot until the Armament route is stable.
- Useful when
- Upgrading personal weapons after safer Voyage runs.
- Route hint
- Farm weapons crates and parts crates, then craft only around the next route.
- Craft use
- M82 Rifle, Blitz 10R Pistol, M82 Rifle
- Likely stop
- Ironclad Loot Box, Ironclad Loot Box 40mm Set 1, Ironclad Loot Box 40mm Set 2
Protect MedKit until the unlock path is clear.
- Next move
- Check Tier I before spending this item elsewhere.
- Do not regret
- Check the unlock path before spending the last copy.
- Useful when
- Targeted loot routes and cargo decisions.
- Route hint
- Start with Medical Cabinet or Suspicious Pile of Sand and stop when cargo space or exit safety gets tight.
- Likely stop
- Medical Cabinet, Suspicious Pile of Sand, Medical Cabinet
Craft or restock 40 mm Shell only when the next route needs it.
- Next move
- Craft it when the route needs it now, not just because the workbench allows it.
- Do not regret
- Bring enough for the planned fight, then leave rare surplus at base.
- Useful when
- Workbench restock and route prep.
- Route hint
- Start with Crate of Shells or Crate of Shells and stop when cargo space or exit safety gets tight.
- Likely stop
- Crate of Shells, Crate of Shells

Craft or restock 70 mm Shell only when the next route needs it.
- Next move
- Craft it when the route needs it now, not just because the workbench allows it.
- Do not regret
- Bring enough for the planned fight, then leave rare surplus at base.
- Useful when
- Workbench restock and route prep.
- Route hint
- Start with Crate of Shells or Crate of Shells and stop when cargo space or exit safety gets tight.
- Likely stop
- Crate of Shells, Crate of Shells

Craft or restock 80 mm Shell only when the next route needs it.
- Next move
- Craft it when the route needs it now, not just because the workbench allows it.
- Do not regret
- Bring enough for the planned fight, then leave rare surplus at base.
- Useful when
- Workbench restock and route prep.
- Route hint
- Start with Crate of Shells or Suspicious Pile of Sand and stop when cargo space or exit safety gets tight.
- Likely stop
- Crate of Shells, Suspicious Pile of Sand, Crate of Shells

Keep the crew alive during longer dune routes.
- Next move
- Carry enough for the route and refill the Trampler before Storm Dive.
- Do not regret
- Do not convert or sell every food item before a long extraction attempt.
- Useful when
- Beginner runs, long looting loops, and crew recovery.
- Route hint
- Food crates and safe starter routes are enough for early sessions.
- Likely stop
- Food Crate, Ironclad Loot Box, Suspicious Pile of Sand
Use Canned Sea Deer XL as a crafting input instead of loose cargo.
- Next move
- Keep enough for Canned Food and Canned Food; sell only the surplus.
- Do not regret
- Keep a reserve stack in one known storage spot.
- Useful when
- Crafting Canned Food or Canned Food.
- Route hint
- Keep enough for Canned Food and Canned Food before treating extras as money.
- Craft use
- Canned Food, Canned Food
Craft or restock Computing Module only when the next route needs it.
- Next move
- Craft it when the route needs it now, not just because the workbench allows it.
- Do not regret
- Keep one copy until the current save proves it is safe to spend.
- Useful when
- Workbench restock and route prep.
- Route hint
- Start with Ironclad Loot Box or Buried Treasure Tier 2 Set 2 and stop when cargo space or exit safety gets tight.
- Likely stop
- Ironclad Loot Box, Buried Treasure Tier 2 Set 2, Ironclad Loot Box 40mm Set 3

Craft or restock Coral Dust only when the next route needs it.
- Next move
- Craft it when the route needs it now, not just because the workbench allows it.
- Do not regret
- Keep one copy until the current save proves it is safe to spend.
- Useful when
- Workbench restock and route prep.
- Route hint
- Start with Food Container Tier 2 Premium Set 2 or Food Container Tier 3 Premium Set 1 and stop when cargo space or exit safety gets tight.
- Likely stop
- Food Container Tier 2 Premium Set 2, Food Container Tier 3 Premium Set 1, Food Container Tier 2 Basic Set 2
Craft or restock Crystal only when the next route needs it.
- Next move
- Craft it when the route needs it now, not just because the workbench allows it.
- Do not regret
- Sell only after the finder shows no contract or crafting pressure.
- Useful when
- Workbench restock and route prep.
- Route hint
- Start with Valuables Container Tier 3 Premium Set 4 and stop when cargo space or exit safety gets tight.
- Likely stop
- Valuables Container Tier 3 Premium Set 4
Use District Officer's Portable Safe as a crafting input instead of loose cargo.
- Next move
- Keep enough for Valuable Papers and Valuable Papers; sell only the surplus.
- Do not regret
- Keep a reserve stack in one known storage spot.
- Useful when
- Crafting Valuable Papers or Valuable Papers.
- Route hint
- Keep enough for Valuable Papers and Valuable Papers before treating extras as money.
- Craft use
- Valuable Papers, Valuable Papers
Keep the walking base powered and ready to leave.
- Next move
- Carry a reserve before adding extra loot weight or taking a longer route.
- Do not regret
- Refill before leaving camp; an empty Trampler turns a good run into a rescue problem.
- Useful when
- Every Trampler route, especially solo play.
- Route hint
- Check power before loot. Leave with less cargo rather than less movement.
- Likely stop
- Ironclad Loot Box, Parts Crate, Suspicious Pile of Sand
Use Raw Aurogen Crystal as a crafting input instead of loose cargo.
- Next move
- Keep enough for Crystal and Crystal; sell only the surplus.
- Do not regret
- Keep a reserve stack in one known storage spot.
- Useful when
- Crafting Crystal or Crystal.
- Route hint
- Keep enough for Crystal and Crystal before treating extras as money.
- Craft use
- Crystal, Crystal, NZ Mk2 Energy Rod
Craft or restock Valuable Papers only when the next route needs it.
- Next move
- Craft it when the route needs it now, not just because the workbench allows it.
- Do not regret
- Sell only after the finder shows no contract or crafting pressure.
- Useful when
- Workbench restock and route prep.
- Route hint
- Start with Valuables Safe or Buried Treasure Tier 2 Set 4 and stop when cargo space or exit safety gets tight.
- Likely stop
- Valuables Safe, Buried Treasure Tier 2 Set 4, Valuables Container Tier 1 Premium Set 2
Feed the right weapon before the next fight or extraction push.
- Next move
- Target Buried Treasure Tier 1 Set 5 or Buried Treasure Tier 2 Set 5 and leave once the main cargo is loaded.
- Do not regret
- Bring enough for the planned fight, then leave rare surplus at base.
- Useful when
- Targeted loot routes and cargo decisions.
- Route hint
- Start with Buried Treasure Tier 1 Set 5 or Buried Treasure Tier 2 Set 5 and stop when cargo space or exit safety gets tight.
- Likely stop
- Buried Treasure Tier 1 Set 5, Buried Treasure Tier 2 Set 5, Weapons Container Tier 3 Premium Set 8

Feed the right weapon before the next fight or extraction push.
- Next move
- Target Ironclad Loot Box 40mm Set 1 or Ironclad Loot Box 40mm Set 2 and leave once the main cargo is loaded.
- Do not regret
- Bring enough for the planned fight, then leave rare surplus at base.
- Useful when
- Targeted loot routes and cargo decisions.
- Route hint
- Start with Ironclad Loot Box 40mm Set 1 or Ironclad Loot Box 40mm Set 2 and stop when cargo space or exit safety gets tight.
- Likely stop
- Ironclad Loot Box 40mm Set 1, Ironclad Loot Box 40mm Set 2, Ironclad Loot Box 40mm Set 3

Feed the right weapon before the next fight or extraction push.
- Next move
- Target Ironclad Loot Box 70mm Set 1 or Ironclad Loot Box 70mm Set 2 and leave once the main cargo is loaded.
- Do not regret
- Bring enough for the planned fight, then leave rare surplus at base.
- Useful when
- Targeted loot routes and cargo decisions.
- Route hint
- Start with Ironclad Loot Box 70mm Set 1 or Ironclad Loot Box 70mm Set 2 and stop when cargo space or exit safety gets tight.
- Likely stop
- Ironclad Loot Box 70mm Set 1, Ironclad Loot Box 70mm Set 2, Ironclad Loot Box 70mm Set 3
Feed the right weapon before the next fight or extraction push.
- Next move
- Target Buried Treasure Tier 1 Set 3 or Buried Treasure Tier 2 Set 6 and leave once the main cargo is loaded.
- Do not regret
- Bring enough for the planned fight, then leave rare surplus at base.
- Useful when
- Targeted loot routes and cargo decisions.
- Route hint
- Start with Buried Treasure Tier 1 Set 3 or Buried Treasure Tier 2 Set 6 and stop when cargo space or exit safety gets tight.
- Likely stop
- Buried Treasure Tier 1 Set 3, Buried Treasure Tier 2 Set 6, Buried Treasure Tier 2 Set 7

Feed the right weapon before the next fight or extraction push.
- Next move
- Target Buried Treasure Tier 1 Set 1 or Buried Treasure Tier 1 Set 3 and leave once the main cargo is loaded.
- Do not regret
- Bring enough for the planned fight, then leave rare surplus at base.
- Useful when
- Targeted loot routes and cargo decisions.
- Route hint
- Start with Buried Treasure Tier 1 Set 1 or Buried Treasure Tier 1 Set 3 and stop when cargo space or exit safety gets tight.
- Likely stop
- Buried Treasure Tier 1 Set 1, Buried Treasure Tier 1 Set 3, Buried Treasure Tier 2 Set 7

Feed the right weapon before the next fight or extraction push.
- Next move
- Target Buried Treasure Tier 1 Set 2 or Buried Treasure Tier 1 Set 6 and leave once the main cargo is loaded.
- Do not regret
- Bring enough for the planned fight, then leave rare surplus at base.
- Useful when
- Targeted loot routes and cargo decisions.
- Route hint
- Start with Buried Treasure Tier 1 Set 2 or Buried Treasure Tier 1 Set 6 and stop when cargo space or exit safety gets tight.
- Likely stop
- Buried Treasure Tier 1 Set 2, Buried Treasure Tier 1 Set 6, Weapons Container Tier 1 Premium Set 1
Decide whether Bartka "Petros" Sniper Rifle is cargo, reserve, or a route target.
- Next move
- Target Buried Treasure Tier 1 Set 5 or Buried Treasure Tier 2 Set 5 and leave once the main cargo is loaded.
- Do not regret
- Keep one copy until the current save proves it is safe to spend.
- Useful when
- Targeted loot routes and cargo decisions.
- Route hint
- Start with Buried Treasure Tier 1 Set 5 or Buried Treasure Tier 2 Set 5 and stop when cargo space or exit safety gets tight.
- Likely stop
- Buried Treasure Tier 1 Set 5, Buried Treasure Tier 2 Set 5, Weapons Container Tier 3 Premium Set 8
Turn Crowns into money only after first-copy checks are done.
- Next move
- Target Suspicious Pile of Sand or Valuables Safe and leave once the main cargo is loaded.
- Do not regret
- Sell only after the finder shows no contract or crafting pressure.
- Useful when
- Targeted loot routes and cargo decisions.
- Route hint
- Start with Suspicious Pile of Sand or Valuables Safe and stop when cargo space or exit safety gets tight.
- Likely stop
- Suspicious Pile of Sand, Valuables Safe, Buried Treasure Tier 1 Set 1

Turn Crystal Handles into money only after first-copy checks are done.
- Next move
- Target Aurogen Crystal and leave once the main cargo is loaded.
- Do not regret
- Sell only after the finder shows no contract or crafting pressure.
- Useful when
- Targeted loot routes and cargo decisions.
- Route hint
- Start with Aurogen Crystal and stop when cargo space or exit safety gets tight.
- Likely stop
- Aurogen Crystal

Decide whether Grenade Contact is cargo, reserve, or a route target.
- Next move
- Target Buried Treasure Tier 1 Set 5 or Buried Treasure Tier 1 Set 6 and leave once the main cargo is loaded.
- Do not regret
- Keep one copy until the current save proves it is safe to spend.
- Useful when
- Targeted loot routes and cargo decisions.
- Route hint
- Start with Buried Treasure Tier 1 Set 5 or Buried Treasure Tier 1 Set 6 and stop when cargo space or exit safety gets tight.
- Likely stop
- Buried Treasure Tier 1 Set 5, Buried Treasure Tier 1 Set 6, Buried Treasure Tier 2 Set 5

Decide whether KF "Drobulet" Shotgun is cargo, reserve, or a route target.
- Next move
- Target Weapons Container Tier 1 Basic Set 4 or Weapons Container Tier 2 Basic Set 4 and leave once the main cargo is loaded.
- Do not regret
- Keep one copy until the current save proves it is safe to spend.
- Useful when
- Targeted loot routes and cargo decisions.
- Route hint
- Start with Weapons Container Tier 1 Basic Set 4 or Weapons Container Tier 2 Basic Set 4 and stop when cargo space or exit safety gets tight.
- Likely stop
- Weapons Container Tier 1 Basic Set 4, Weapons Container Tier 2 Basic Set 4, Weapons Container Tier 1 Standard Set 4
Decide whether Mixtures is cargo, reserve, or a route target.
- Next move
- Target Medical Cabinet or Medical Container Tier 1 Premium Set 1 and leave once the main cargo is loaded.
- Do not regret
- Keep one copy until the current save proves it is safe to spend.
- Useful when
- Targeted loot routes and cargo decisions.
- Route hint
- Start with Medical Cabinet or Medical Container Tier 1 Premium Set 1 and stop when cargo space or exit safety gets tight.
- Likely stop
- Medical Cabinet, Medical Container Tier 1 Premium Set 1, Medical Container Tier 2 Premium Set 1
Decide whether O'Donnel "Blitz" SA Pistol is cargo, reserve, or a route target.
- Next move
- Target Buried Treasure Tier 1 Set 1 or Buried Treasure Tier 1 Set 3 and leave once the main cargo is loaded.
- Do not regret
- Keep one copy until the current save proves it is safe to spend.
- Useful when
- Targeted loot routes and cargo decisions.
- Route hint
- Start with Buried Treasure Tier 1 Set 1 or Buried Treasure Tier 1 Set 3 and stop when cargo space or exit safety gets tight.
- Likely stop
- Buried Treasure Tier 1 Set 1, Buried Treasure Tier 1 Set 3, Buried Treasure Tier 2 Set 3

Decide whether Rifle Musket is cargo, reserve, or a route target.
- Next move
- Target Weapons Container Tier 1 Basic Set 1 or Weapons Container Tier 2 Basic Set 1 and leave once the main cargo is loaded.
- Do not regret
- Keep one copy until the current save proves it is safe to spend.
- Useful when
- Targeted loot routes and cargo decisions.
- Route hint
- Start with Weapons Container Tier 1 Basic Set 1 or Weapons Container Tier 2 Basic Set 1 and stop when cargo space or exit safety gets tight.
- Likely stop
- Weapons Container Tier 1 Basic Set 1, Weapons Container Tier 2 Basic Set 1, Weapons Container Tier 1 Standard Set 1

Decide whether Rocket Launcher is cargo, reserve, or a route target.
- Next move
- Target Buried Treasure Tier 2 Set 6 or Buried Treasure Tier 2 Set 7 and leave once the main cargo is loaded.
- Do not regret
- Keep one copy until the current save proves it is safe to spend.
- Useful when
- Targeted loot routes and cargo decisions.
- Route hint
- Start with Buried Treasure Tier 2 Set 6 or Buried Treasure Tier 2 Set 7 and stop when cargo space or exit safety gets tight.
- Likely stop
- Buried Treasure Tier 2 Set 6, Buried Treasure Tier 2 Set 7
Decide whether SGOW M82 Revolver Rifle is cargo, reserve, or a route target.
- Next move
- Target Buried Treasure Tier 1 Set 2 or Weapons Container Tier 1 Premium Set 1 and leave once the main cargo is loaded.
- Do not regret
- Keep one copy until the current save proves it is safe to spend.
- Useful when
- Targeted loot routes and cargo decisions.
- Route hint
- Start with Buried Treasure Tier 1 Set 2 or Weapons Container Tier 1 Premium Set 1 and stop when cargo space or exit safety gets tight.
- Likely stop
- Buried Treasure Tier 1 Set 2, Weapons Container Tier 1 Premium Set 1, Weapons Container Tier 2 Premium Set 1

Bank cash without giving up progression material.
- Next move
- Sell surplus when no contract or workbench route is attached.
- Do not regret
- Keep rare-looking valuables separate until the finder says they are safe cash.
- Useful when
- Funding early repairs, ammo, and low-risk upgrades.
- Route hint
- Valuable safes are useful only if the extraction route is still under control.
- Likely stop
- Suspicious Pile of Sand, Valuables Safe, Buried Treasure Tier 1 Set 3
Decide whether Small Explosive is cargo, reserve, or a route target.
- Next move
- Target Buried Treasure Tier 1 Set 4 or Buried Treasure Tier 2 Set 1 and leave once the main cargo is loaded.
- Do not regret
- Keep one copy until the current save proves it is safe to spend.
- Useful when
- Targeted loot routes and cargo decisions.
- Route hint
- Start with Buried Treasure Tier 1 Set 4 or Buried Treasure Tier 2 Set 1 and stop when cargo space or exit safety gets tight.
- Likely stop
- Buried Treasure Tier 1 Set 4, Buried Treasure Tier 2 Set 1, Weapons Container Tier 2 Basic Set 1

Craft or restock Pristine 40 mm Autocannon Kit only when the next route needs it.
- Next move
- Craft it when the route needs it now, not just because the workbench allows it.
- Do not regret
- Keep one copy until the current save proves it is safe to spend.
- Useful when
- Workbench restock and route prep.
- Route hint
- Save one copy until the current save proves it is only spare cargo.
Craft or restock Pristine 70 mm Shotgun Cannon Kit only when the next route needs it.
- Next move
- Craft it when the route needs it now, not just because the workbench allows it.
- Do not regret
- Keep one copy until the current save proves it is safe to spend.
- Useful when
- Workbench restock and route prep.
- Route hint
- Save one copy until the current save proves it is only spare cargo.
Craft or restock Pristine 80 mm Naval Cannon Kit only when the next route needs it.
- Next move
- Craft it when the route needs it now, not just because the workbench allows it.
- Do not regret
- Keep one copy until the current save proves it is safe to spend.
- Useful when
- Workbench restock and route prep.
- Route hint
- Save one copy until the current save proves it is only spare cargo.
Use Drobulet Shotgun as a crafting input instead of loose cargo.
- Next move
- Keep enough for Drobulet Shotgun (Vertical Choke) and Drobulet Shotgun (Vertical Choke); sell only the surplus.
- Do not regret
- Keep a reserve stack in one known storage spot.
- Useful when
- Crafting Drobulet Shotgun (Vertical Choke) or Drobulet Shotgun (Vertical Choke).
- Route hint
- Start with Weapon Crate or Weapon Crate and stop when cargo space or exit safety gets tight.
- Craft use
- Drobulet Shotgun (Vertical Choke), Drobulet Shotgun (Vertical Choke)
- Likely stop
- Weapon Crate, Weapon Crate
Decide whether Metal Parts should be delivered before it becomes cash.
- Next move
- Hold the delivery amount, check the timer if listed, then extract instead of widening the run.
- Do not regret
- Separate contract cargo from sell cargo before opening the shop or hand-in screen.
- Useful when
- Delivery runs and clean extraction planning.
- Route hint
- Reserve the delivery stack, then leave once the cargo is secure. Reward: 1000 x Crowns.
- Delivery
- 250 x Metal Parts -> 1000 x Crowns -> 4 crowns per item
- Likely stop
- Resource Container Tier 1 Premium Set 1, Resource Container Tier 1 Premium Set 2, Resource Container Tier 2 Premium Set 1

Use 1874e Petros Rifle as a crafting input instead of loose cargo.
- Next move
- Keep enough for 1874e/sd Petros Rifle (Silenced) and 1874s Petros Sniper Rifle; sell only the surplus.
- Do not regret
- Keep a reserve stack in one known storage spot.
- Useful when
- Crafting 1874e/sd Petros Rifle (Silenced) or 1874s Petros Sniper Rifle.
- Route hint
- Start with Suspicious Pile of Sand or Suspicious Pile of Sand and stop when cargo space or exit safety gets tight.
- Craft use
- 1874e/sd Petros Rifle (Silenced), 1874s Petros Sniper Rifle, 1874s Petros Sniper Rifle
- Likely stop
- Suspicious Pile of Sand, Suspicious Pile of Sand
Use 1874e/sd Petros Rifle (Silenced) as a crafting input instead of loose cargo.
- Next move
- Keep enough for 1874s/sd Petros Sniper Rifle (Silenced) and 1874s/sd Petros Sniper Rifle (Silenced); sell only the surplus.
- Do not regret
- Keep a reserve stack in one known storage spot.
- Useful when
- Crafting 1874s/sd Petros Sniper Rifle (Silenced) or 1874s/sd Petros Sniper Rifle (Silenced).
- Route hint
- Keep enough for 1874s/sd Petros Sniper Rifle (Silenced) and 1874s/sd Petros Sniper Rifle (Silenced) before treating extras as money.
- Craft use
- 1874s/sd Petros Sniper Rifle (Silenced), 1874s/sd Petros Sniper Rifle (Silenced)

Use 1874s Petros Sniper Rifle as a crafting input instead of loose cargo.
- Next move
- Keep enough for 1874s/sd Petros Sniper Rifle (Silenced) and 1874s/sd Petros Sniper Rifle (Silenced); sell only the surplus.
- Do not regret
- Keep a reserve stack in one known storage spot.
- Useful when
- Crafting 1874s/sd Petros Sniper Rifle (Silenced) or 1874s/sd Petros Sniper Rifle (Silenced).
- Route hint
- Keep enough for 1874s/sd Petros Sniper Rifle (Silenced) and 1874s/sd Petros Sniper Rifle (Silenced) before treating extras as money.
- Craft use
- 1874s/sd Petros Sniper Rifle (Silenced), 1874s/sd Petros Sniper Rifle (Silenced)

Craft or restock 11x54 mm Ammo only when the next route needs it.
- Next move
- Craft it when the route needs it now, not just because the workbench allows it.
- Do not regret
- Bring enough for the planned fight, then leave rare surplus at base.
- Useful when
- Workbench restock and route prep.
- Route hint
- Start with Suspicious Pile of Sand or Suspicious Pile of Sand and stop when cargo space or exit safety gets tight.
- Likely stop
- Suspicious Pile of Sand, Suspicious Pile of Sand

Craft or restock 12 GA Shotgun Slug only when the next route needs it.
- Next move
- Craft it when the route needs it now, not just because the workbench allows it.
- Do not regret
- Bring enough for the planned fight, then leave rare surplus at base.
- Useful when
- Workbench restock and route prep.
- Route hint
- Start with Weapon Crate or Weapon Crate and stop when cargo space or exit safety gets tight.
- Likely stop
- Weapon Crate, Weapon Crate

Craft or restock 8x21 mm Ammo only when the next route needs it.
- Next move
- Craft it when the route needs it now, not just because the workbench allows it.
- Do not regret
- Bring enough for the planned fight, then leave rare surplus at base.
- Useful when
- Workbench restock and route prep.
- Route hint
- Start with Suspicious Pile of Sand or Weapon Crate and stop when cargo space or exit safety gets tight.
- Likely stop
- Suspicious Pile of Sand, Weapon Crate, Suspicious Pile of Sand
Craft or restock 9x42 mm Ammo only when the next route needs it.
- Next move
- Craft it when the route needs it now, not just because the workbench allows it.
- Do not regret
- Bring enough for the planned fight, then leave rare surplus at base.
- Useful when
- Workbench restock and route prep.
- Route hint
- Start with Suspicious Pile of Sand or Weapon Crate and stop when cargo space or exit safety gets tight.
- Likely stop
- Suspicious Pile of Sand, Weapon Crate, Suspicious Pile of Sand
Craft or restock Armor-Piercing Rocket only when the next route needs it.
- Next move
- Craft it when the route needs it now, not just because the workbench allows it.
- Do not regret
- Bring enough for the planned fight, then leave rare surplus at base.
- Useful when
- Workbench restock and route prep.
- Route hint
- Start with Suspicious Pile of Sand or Suspicious Pile of Sand and stop when cargo space or exit safety gets tight.
- Likely stop
- Suspicious Pile of Sand, Suspicious Pile of Sand

Craft or restock Blitz 10R Pistol only when the next route needs it.
- Next move
- Craft it when the route needs it now, not just because the workbench allows it.
- Do not regret
- Keep one copy until the current save proves it is safe to spend.
- Useful when
- Workbench restock and route prep.
- Route hint
- Start with Suspicious Pile of Sand or Weapon Crate and stop when cargo space or exit safety gets tight.
- Likely stop
- Suspicious Pile of Sand, Weapon Crate, Suspicious Pile of Sand
Craft or restock Blitz PPS-5 Pistol only when the next route needs it.
- Next move
- Craft it when the route needs it now, not just because the workbench allows it.
- Do not regret
- Keep one copy until the current save proves it is safe to spend.
- Useful when
- Workbench restock and route prep.
- Route hint
- Start with Weapon Crate or Weapon Crate and stop when cargo space or exit safety gets tight.
- Likely stop
- Weapon Crate, Weapon Crate
Craft or restock HG-6 Contact Grenade only when the next route needs it.
- Next move
- Craft it when the route needs it now, not just because the workbench allows it.
- Do not regret
- Keep one copy until the current save proves it is safe to spend.
- Useful when
- Workbench restock and route prep.
- Route hint
- Start with Suspicious Pile of Sand or Suspicious Pile of Sand and stop when cargo space or exit safety gets tight.
- Likely stop
- Suspicious Pile of Sand, Suspicious Pile of Sand
Craft or restock M1866/9 "Einzel" Breechloader only when the next route needs it.
- Next move
- Craft it when the route needs it now, not just because the workbench allows it.
- Do not regret
- Keep one copy until the current save proves it is safe to spend.
- Useful when
- Workbench restock and route prep.
- Route hint
- Start with Weapon Crate or Weapon Crate and stop when cargo space or exit safety gets tight.
- Likely stop
- Weapon Crate, Weapon Crate

Craft or restock M82 Rifle only when the next route needs it.
- Next move
- Craft it when the route needs it now, not just because the workbench allows it.
- Do not regret
- Keep one copy until the current save proves it is safe to spend.
- Useful when
- Workbench restock and route prep.
- Route hint
- Start with Suspicious Pile of Sand or Weapon Crate and stop when cargo space or exit safety gets tight.
- Likely stop
- Suspicious Pile of Sand, Weapon Crate, Suspicious Pile of Sand
Craft or restock Pepper Mill Shotgun only when the next route needs it.
- Next move
- Craft it when the route needs it now, not just because the workbench allows it.
- Do not regret
- Keep one copy until the current save proves it is safe to spend.
- Useful when
- Workbench restock and route prep.
- Route hint
- Start with Suspicious Pile of Sand or Weapon Crate and stop when cargo space or exit safety gets tight.
- Likely stop
- Suspicious Pile of Sand, Weapon Crate, Suspicious Pile of Sand
Craft or restock Old Smuggler's Jacket only when the next route needs it.
- Next move
- Craft it when the route needs it now, not just because the workbench allows it.
- Do not regret
- Keep one copy until the current save proves it is safe to spend.
- Useful when
- Workbench restock and route prep.
- Route hint
- Start with Weapons Resupply Ammo or Weapons Resupply Guns and stop when cargo space or exit safety gets tight.
- Likely stop
- Weapons Resupply Ammo, Weapons Resupply Guns, Weapons Resupply Shells
Craft or restock SGOW SW.52 Body Armor only when the next route needs it.
- Next move
- Craft it when the route needs it now, not just because the workbench allows it.
- Do not regret
- Keep one copy until the current save proves it is safe to spend.
- Useful when
- Workbench restock and route prep.
- Route hint
- Start with Suspicious Pile of Sand or Suspicious Pile of Sand and stop when cargo space or exit safety gets tight.
- Likely stop
- Suspicious Pile of Sand, Suspicious Pile of Sand
Feed the right weapon before the next fight or extraction push.
- Next move
- Target Weapons Container Tier 2 Premium Set 4 or Weapons Container Tier 3 Premium Set 5 and leave once the main cargo is loaded.
- Do not regret
- Bring enough for the planned fight, then leave rare surplus at base.
- Useful when
- Targeted loot routes and cargo decisions.
- Route hint
- Start with Weapons Container Tier 2 Premium Set 4 or Weapons Container Tier 3 Premium Set 5 and stop when cargo space or exit safety gets tight.
- Likely stop
- Weapons Container Tier 2 Premium Set 4, Weapons Container Tier 3 Premium Set 5
Feed the right weapon before the next fight or extraction push.
- Next move
- Target Weapons Container Tier 1 Premium Set 4 or Weapons Container Tier 3 Standard Set 4 and leave once the main cargo is loaded.
- Do not regret
- Bring enough for the planned fight, then leave rare surplus at base.
- Useful when
- Targeted loot routes and cargo decisions.
- Route hint
- Start with Weapons Container Tier 1 Premium Set 4 or Weapons Container Tier 3 Standard Set 4 and stop when cargo space or exit safety gets tight.
- Likely stop
- Weapons Container Tier 1 Premium Set 4, Weapons Container Tier 3 Standard Set 4
Feed the right weapon before the next fight or extraction push.
- Next move
- Target Ironclad Loot Box or Ironclad Loot Box and leave once the main cargo is loaded.
- Do not regret
- Bring enough for the planned fight, then leave rare surplus at base.
- Useful when
- Targeted loot routes and cargo decisions.
- Route hint
- Start with Ironclad Loot Box or Ironclad Loot Box and stop when cargo space or exit safety gets tight.
- Likely stop
- Ironclad Loot Box, Ironclad Loot Box
Feed the right weapon before the next fight or extraction push.
- Next move
- Target Weapon Crate or Weapon Crate and leave once the main cargo is loaded.
- Do not regret
- Bring enough for the planned fight, then leave rare surplus at base.
- Useful when
- Targeted loot routes and cargo decisions.
- Route hint
- Start with Weapon Crate or Weapon Crate and stop when cargo space or exit safety gets tight.
- Likely stop
- Weapon Crate, Weapon Crate
Feed the right weapon before the next fight or extraction push.
- Next move
- Target Buried Treasure Tier 1 Set 4 or Buried Treasure Tier 2 Set 3 and leave once the main cargo is loaded.
- Do not regret
- Bring enough for the planned fight, then leave rare surplus at base.
- Useful when
- Targeted loot routes and cargo decisions.
- Route hint
- Start with Buried Treasure Tier 1 Set 4 or Buried Treasure Tier 2 Set 3 and stop when cargo space or exit safety gets tight.
- Likely stop
- Buried Treasure Tier 1 Set 4, Buried Treasure Tier 2 Set 3, Buried Treasure Tier 2 Set 4
Feed the right weapon before the next fight or extraction push.
- Next move
- Target Suspicious Pile of Sand or Weapon Crate and leave once the main cargo is loaded.
- Do not regret
- Bring enough for the planned fight, then leave rare surplus at base.
- Useful when
- Targeted loot routes and cargo decisions.
- Route hint
- Start with Suspicious Pile of Sand or Weapon Crate and stop when cargo space or exit safety gets tight.
- Likely stop
- Suspicious Pile of Sand, Weapon Crate, Suspicious Pile of Sand
Feed the right weapon before the next fight or extraction push.
- Next move
- Target Buried Treasure Tier 2 Set 2 or Weapons Container Tier 2 Premium Set 1 and leave once the main cargo is loaded.
- Do not regret
- Bring enough for the planned fight, then leave rare surplus at base.
- Useful when
- Targeted loot routes and cargo decisions.
- Route hint
- Start with Buried Treasure Tier 2 Set 2 or Weapons Container Tier 2 Premium Set 1 and stop when cargo space or exit safety gets tight.
- Likely stop
- Buried Treasure Tier 2 Set 2, Weapons Container Tier 2 Premium Set 1, Weapons Container Tier 3 Premium Set 6

Decide whether EB "Vita" Police Revolver is cargo, reserve, or a route target.
- Next move
- Target Weapon Crate or Weapon Crate and leave once the main cargo is loaded.
- Do not regret
- Keep one copy until the current save proves it is safe to spend.
- Useful when
- Targeted loot routes and cargo decisions.
- Route hint
- Start with Weapon Crate or Weapon Crate and stop when cargo space or exit safety gets tight.
- Likely stop
- Weapon Crate, Weapon Crate
Feed the right weapon before the next fight or extraction push.
- Next move
- Target Ironclad Loot Box or Ironclad Loot Box and leave once the main cargo is loaded.
- Do not regret
- Bring enough for the planned fight, then leave rare surplus at base.
- Useful when
- Targeted loot routes and cargo decisions.
- Route hint
- Start with Ironclad Loot Box or Ironclad Loot Box and stop when cargo space or exit safety gets tight.
- Likely stop
- Ironclad Loot Box, Ironclad Loot Box
Turn Key into money only after first-copy checks are done.
- Next move
- Target Ghoul Range Set 5 or Valuables Container Tier 3 Premium Set 3 and leave once the main cargo is loaded.
- Do not regret
- Sell only after the finder shows no contract or crafting pressure.
- Useful when
- Targeted loot routes and cargo decisions.
- Route hint
- Start with Ghoul Range Set 5 or Valuables Container Tier 3 Premium Set 3 and stop when cargo space or exit safety gets tight.
- Likely stop
- Ghoul Range Set 5, Valuables Container Tier 3 Premium Set 3

Decide whether KF866/9R "Mehrzel" Repeater is cargo, reserve, or a route target.
- Next move
- Target Suspicious Pile of Sand or Suspicious Pile of Sand and leave once the main cargo is loaded.
- Do not regret
- Keep one copy until the current save proves it is safe to spend.
- Useful when
- Targeted loot routes and cargo decisions.
- Route hint
- Start with Suspicious Pile of Sand or Suspicious Pile of Sand and stop when cargo space or exit safety gets tight.
- Likely stop
- Suspicious Pile of Sand, Suspicious Pile of Sand
Decide whether Leviathan Meat is cargo, reserve, or a route target.
- Next move
- Target Food Container Tier 2 Premium Set 1 or Food Container Tier 3 Premium Set 2 and leave once the main cargo is loaded.
- Do not regret
- Keep one copy until the current save proves it is safe to spend.
- Useful when
- Targeted loot routes and cargo decisions.
- Route hint
- Start with Food Container Tier 2 Premium Set 1 or Food Container Tier 3 Premium Set 2 and stop when cargo space or exit safety gets tight.
- Likely stop
- Food Container Tier 2 Premium Set 1, Food Container Tier 3 Premium Set 2, Food Container Tier 2 Basic Set 1
Decide whether Leviathan Skin is cargo, reserve, or a route target.
- Next move
- Target Valuables Container Tier 2 Premium Set 1 or Valuables Container Tier 2 Premium Set 2 and leave once the main cargo is loaded.
- Do not regret
- Keep one copy until the current save proves it is safe to spend.
- Useful when
- Targeted loot routes and cargo decisions.
- Route hint
- Start with Valuables Container Tier 2 Premium Set 1 or Valuables Container Tier 2 Premium Set 2 and stop when cargo space or exit safety gets tight.
- Likely stop
- Valuables Container Tier 2 Premium Set 1, Valuables Container Tier 2 Premium Set 2, Valuables Container Tier 3 Premium Set 1
Feed the right weapon before the next fight or extraction push.
- Next move
- Target Ironclad Loot Box or Ironclad Loot Box and leave once the main cargo is loaded.
- Do not regret
- Bring enough for the planned fight, then leave rare surplus at base.
- Useful when
- Targeted loot routes and cargo decisions.
- Route hint
- Start with Ironclad Loot Box or Ironclad Loot Box and stop when cargo space or exit safety gets tight.
- Likely stop
- Ironclad Loot Box, Ironclad Loot Box
Decide whether NZ Mk1 Modified Energy Rod is cargo, reserve, or a route target.
- Next move
- Target Ironclad Loot Box or Ironclad Loot Box and leave once the main cargo is loaded.
- Do not regret
- Keep one copy until the current save proves it is safe to spend.
- Useful when
- Targeted loot routes and cargo decisions.
- Route hint
- Start with Ironclad Loot Box or Ironclad Loot Box and stop when cargo space or exit safety gets tight.
- Likely stop
- Ironclad Loot Box, Ironclad Loot Box

Decide whether O'Donnel "Pepper Mill" Shothgun is cargo, reserve, or a route target.
- Next move
- Target Buried Treasure Tier 1 Set 4 or Weapons Container Tier 1 Premium Set 4 and leave once the main cargo is loaded.
- Do not regret
- Keep one copy until the current save proves it is safe to spend.
- Useful when
- Targeted loot routes and cargo decisions.
- Route hint
- Start with Buried Treasure Tier 1 Set 4 or Weapons Container Tier 1 Premium Set 4 and stop when cargo space or exit safety gets tight.
- Likely stop
- Buried Treasure Tier 1 Set 4, Weapons Container Tier 1 Premium Set 4, Weapons Container Tier 2 Premium Set 4
Decide whether Reinforced Leather Strips is cargo, reserve, or a route target.
- Next move
- Target Food Container Tier 3 Premium Set 1 or Food Container Tier 3 Premium Set 2 and leave once the main cargo is loaded.
- Do not regret
- Keep one copy until the current save proves it is safe to spend.
- Useful when
- Targeted loot routes and cargo decisions.
- Route hint
- Start with Food Container Tier 3 Premium Set 1 or Food Container Tier 3 Premium Set 2 and stop when cargo space or exit safety gets tight.
- Likely stop
- Food Container Tier 3 Premium Set 1, Food Container Tier 3 Premium Set 2, Food Container Tier 3 Standard Set 1
Decide whether Rifle Musket Clip is cargo, reserve, or a route target.
- Next move
- Target Buried Treasure Tier 1 Set 6 or Weapons Container Tier 3 Premium Set 1 and leave once the main cargo is loaded.
- Do not regret
- Keep one copy until the current save proves it is safe to spend.
- Useful when
- Targeted loot routes and cargo decisions.
- Route hint
- Start with Buried Treasure Tier 1 Set 6 or Weapons Container Tier 3 Premium Set 1 and stop when cargo space or exit safety gets tight.
- Likely stop
- Buried Treasure Tier 1 Set 6, Weapons Container Tier 3 Premium Set 1
Decide whether Rifle Repeater Aperture is cargo, reserve, or a route target.
- Next move
- Target Buried Treasure Tier 2 Set 2 or Weapons Container Tier 3 Premium Set 3 and leave once the main cargo is loaded.
- Do not regret
- Keep one copy until the current save proves it is safe to spend.
- Useful when
- Targeted loot routes and cargo decisions.
- Route hint
- Start with Buried Treasure Tier 2 Set 2 or Weapons Container Tier 3 Premium Set 3 and stop when cargo space or exit safety gets tight.
- Likely stop
- Buried Treasure Tier 2 Set 2, Weapons Container Tier 3 Premium Set 3
Decide whether Shotgun Triplet is cargo, reserve, or a route target.
- Next move
- Target Buried Treasure Tier 2 Set 1 and leave once the main cargo is loaded.
- Do not regret
- Keep one copy until the current save proves it is safe to spend.
- Useful when
- Targeted loot routes and cargo decisions.
- Route hint
- Start with Buried Treasure Tier 2 Set 1 and stop when cargo space or exit safety gets tight.
- Likely stop
- Buried Treasure Tier 2 Set 1
Feed the right weapon before the next fight or extraction push.
- Next move
- Target Ironclad Loot Box or Ironclad Loot Box and leave once the main cargo is loaded.
- Do not regret
- Bring enough for the planned fight, then leave rare surplus at base.
- Useful when
- Targeted loot routes and cargo decisions.
- Route hint
- Start with Ironclad Loot Box or Ironclad Loot Box and stop when cargo space or exit safety gets tight.
- Likely stop
- Ironclad Loot Box, Ironclad Loot Box
Decide whether Weird Coral is cargo, reserve, or a route target.
- Next move
- Target Ghoul Melee Set 5 or Ghoul Range Set 6 and leave once the main cargo is loaded.
- Do not regret
- Keep one copy until the current save proves it is safe to spend.
- Useful when
- Targeted loot routes and cargo decisions.
- Route hint
- Start with Ghoul Melee Set 5 or Ghoul Range Set 6 and stop when cargo space or exit safety gets tight.
- Likely stop
- Ghoul Melee Set 5, Ghoul Range Set 6

Protect NZ AzE81L Motor-Reactor, Framed Rounded until the unlock path is clear.
- Next move
- Check Tier I before spending this item elsewhere.
- Do not regret
- Check the unlock path before spending the last copy.
- Useful when
- Storage cleanup before the next run.
- Route hint
- Save one copy until the current save proves it is only spare cargo.

Protect NZ Mb3 Maneuver Engine, Medium until the unlock path is clear.
- Next move
- Check Tier III before spending this item elsewhere.
- Do not regret
- Check the unlock path before spending the last copy.
- Useful when
- Storage cleanup before the next run.
- Route hint
- Save one copy until the current save proves it is only spare cargo.

Protect S.Trs Auxiliary Corridor until the unlock path is clear.
- Next move
- Check Tier III before spending this item elsewhere.
- Do not regret
- Check the unlock path before spending the last copy.
- Useful when
- Storage cleanup before the next run.
- Route hint
- Save one copy until the current save proves it is only spare cargo.

Protect S.Trs Cargo Compartment, Small until the unlock path is clear.
- Next move
- Check Tier IV before spending this item elsewhere.
- Do not regret
- Check the unlock path before spending the last copy.
- Useful when
- Storage cleanup before the next run.
- Route hint
- Save one copy until the current save proves it is only spare cargo.

Protect S.Trs HAs Framed Armor Plate until the unlock path is clear.
- Next move
- Check Tier III before spending this item elsewhere.
- Do not regret
- Check the unlock path before spending the last copy.
- Useful when
- Storage cleanup before the next run.
- Route hint
- Save one copy until the current save proves it is only spare cargo.

Protect S&H Armaments Workshop until the unlock path is clear.
- Next move
- Check Tier I before spending this item elsewhere.
- Do not regret
- Check the unlock path before spending the last copy.
- Useful when
- Storage cleanup before the next run.
- Route hint
- Save one copy until the current save proves it is only spare cargo.

Protect S&H Auxiliary Corridor until the unlock path is clear.
- Next move
- Check Tier II before spending this item elsewhere.
- Do not regret
- Check the unlock path before spending the last copy.
- Useful when
- Storage cleanup before the next run.
- Route hint
- Save one copy until the current save proves it is only spare cargo.

Protect S&H Cargo Compartment, Small until the unlock path is clear.
- Next move
- Check Tier II before spending this item elsewhere.
- Do not regret
- Check the unlock path before spending the last copy.
- Useful when
- Storage cleanup before the next run.
- Route hint
- Save one copy until the current save proves it is only spare cargo.

Protect S&H M78k Framed Steering Deck until the unlock path is clear.
- Next move
- Check Tier I before spending this item elsewhere.
- Do not regret
- Check the unlock path before spending the last copy.
- Useful when
- Storage cleanup before the next run.
- Route hint
- Save one copy until the current save proves it is only spare cargo.
No matching item. Clear search, widen the use filter, or save the item until the current save proves it is spare cargo.
The SAND: Raiders of Sophie loot mistake that hurts most is not missing an item. It is selling the item five minutes before the next contract, craft, research unlock, or Trampler build asks for it. Use the finder before opening the sell screen: search the item, check the pressure label, save anything your next route still needs, and sell only the surplus.
Last checked: June 30, 2026. SAND is in Early Access, so exact values, contract timing, and route comfort can change. The finder is built around player decisions that remain useful: keep first copies, separate contract cargo, protect crafting inputs, and extract once the target item is secure.
Quick Answer
Use this order before selling:
- Search the item name.
- If it says contract, delivery, unlock, craft reserve, ammo input, or power reserve, keep the first copy.
- If it feeds a Trampler or weapon plan, store enough for the next build.
- If it is only surplus sell cargo, sell it after the route is safe.
- If the finder is uncertain in your current save, keep one copy until the next run proves it is spare.
Cash matters, but cash is not the only progress path. A stored item that completes a contract or keeps the Trampler alive can be worth more than a small payout.
Keep / Sell / Deliver / Craft Finder
The tool above is designed for repeat use. Search an item, filter by use or risk, save items you still need, and reset the saved list after a storage cleanup. It does not show a raw item encyclopedia because the important question is not “what exists?” The important question is “what should I do before I click sell?”
| Finder result | Meaning | Best move |
|---|---|---|
| Keep first | The item has enough future pressure that selling the last copy is risky | Store one stack or one copy in a known cargo lane |
| Contract cargo | The item can be part of a delivery or timed objective | Reserve the stack and route toward extraction |
| Craft reserve | The item feeds ammo, weapons, parts, or other workbench needs | Keep enough for the next route before selling extras |
| Power reserve | The item supports Trampler movement or route safety | Treat it as survival margin, not loose cash |
| Cash lane | The item looks safer to sell once first-copy checks are done | Sell surplus, but keep rare-looking items separate until confirmed |
The save button is useful when a run produces several important items at once. Save them, sort the hold, then clear the saved list after storage is clean.
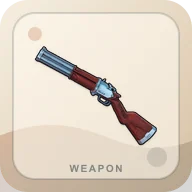
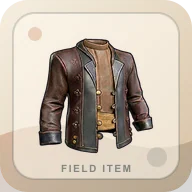
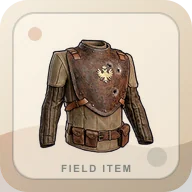
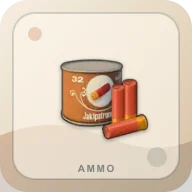
The small item images are there for the messy moment after extraction, when similar cargo names start to blur together. Use the image as a second check, not the whole decision. Match the item visually, confirm the name, then read the action line: keep first copy, deliver, craft, sell surplus, or route toward extraction. If the image and the item name do not feel like a clean match in your current save, keep one copy and make the sale later.
The First-Copy Rule
The safest early loot rule is simple: keep the first copy of anything that looks rare, technical, contract-shaped, or tied to the Trampler. This rule is not about hoarding forever. It is about preventing the one sale that blocks the next hour.
First-copy items worth pausing over include:
- Black Box
- Coral Chunk
- Mechanical Parts
- Pneumatic Parts
- Threads
- Fabric Scraps
- Weapon Parts
- Scrap Metal
- Scrapped Ammo
- High-Grade Gunpowder
- Computing Module
- Raw Aurogen Crystal
- NZ Mk2 Energy Rod
- Rare shells and ammo
Some of these can become safe surplus later. Early on, treat them as route pieces until your current save proves otherwise.
Contract Cargo
Contract items should be separated from sell cargo as soon as they enter the run. The danger is not only death; it is confusion. When the Trampler hold is full, ordinary valuables, crafting parts, and delivery cargo can all look like “loot.” That is when players sell or drop the wrong thing.
Use this contract habit:
| Step | Action |
|---|---|
| 1 | Search the item in the finder before selling |
| 2 | Move delivery cargo into a reserved lane |
| 3 | Stop widening the route once the item is secured |
| 4 | Extract before a side fight turns the delivery into a loss |
| 5 | Re-check storage after returning to camp |
Black Box is the clearest example. If it is on board, the run has a purpose. Do not keep widening the route as if the purpose is still missing.
Crafting And Ammo Inputs
Scrap Metal and Scrapped Ammo are easy to undervalue because they sound common. In practice, they feed early weapon and ammo recovery. Selling every stack can make the next route weaker even if the current wallet looks better.
| Item type | Why to keep some |
|---|---|
| Scrap Metal | Feeds starter ammo and basic weapon recovery |
| Scrapped Ammo | Converts into rounds and shells that keep fights affordable |
| Fabric Scraps / Fabric | Can support ammunition, equipment, or route recovery |
| Gunpowder / High-Grade Gunpowder | Protects ammo planning and higher-pressure loadouts |
| Weapon Parts | Helps move from found guns into planned equipment |
The right amount depends on your save, but the habit is consistent: keep a reserve, craft for the route you are about to play, and sell only what remains after the next loadout is covered.
Trampler Materials
Trampler materials are the easiest to regret selling because the walking base changes what counts as progress. Cargo, power, engines, crew space, armor, and mounted weapons all compete for materials. A small sale can feel harmless until the next build check asks for exactly what you cleared out.
Before selling Trampler-looking parts, ask:
- Does this help cargo, power, crew space, movement, or mounted weapons?
- Does the Trampler Guide show a pressure point I am trying to fix?
- Am I selling the last copy or true surplus?
- Will the next route need this more than the shop does?
If the answer is uncertain, keep one copy. Storage discipline beats regret.
Route Hints And Loot Stops
The finder includes likely stops only when the match is strong enough to help a player choose a route. Treat route hints as shortlists, not promises that every run will behave the same way. SAND routes can shift with updates, mode choice, and risk.
Useful route habits:
| If you need… | Route habit |
|---|---|
| Food or healing | Target safer crates early, then leave before food becomes the reason you stay |
| Parts and ammo inputs | Run a focused loot lane and extract before the hold becomes a mixed pile |
| Contract cargo | Stop after the delivery item is secured |
| Valuables | Keep first-copy checks separate from cash items |
| Rare Trampler parts | Use shorter routes until the build can protect them |
The route hint is not permission to overstay. Once the target item is on board, the best loot stop is often the exit.
Sell Decisions After A Run
After extraction, sort the hold in this order:
- Contract cargo.
- Trampler materials.
- Crafting and ammo inputs.
- Food, fuel, healing, and route support.
- Rare valuables.
- Safe surplus.
That order protects the next route before it funds the next purchase. It also keeps your storage readable. A messy storage system is a hidden enemy in SAND because the sell screen rewards speed, and speed sells the wrong thing.
What To Open Next
Open the Beginner Guide if you are still learning what to bring and when to leave. Open the Extraction Guide if good loot keeps dying at the radio tower, Storm Dive exit, or Trampler parking step. Open the Trampler Guide if the item you are protecting exists to fix cargo, power, crew, armor, engines, or mounted weapons.
The loot finder is worth bookmarking because it answers a repeat question: “Can I safely sell this, or does my next run need it?” In SAND, that question appears after almost every successful extraction.
FAQ
Should I sell loot in SAND Raiders of Sophie?
Sell surplus only after checking whether the item has contract, crafting, research, ammo, or Trampler pressure. Keep first copies of strange or rare items.
What SAND items should beginners keep?
Keep early copies of Black Box, Coral Chunk, Mechanical Parts, Pneumatic Parts, Threads, Weapon Parts, Scrapped Ammo, Scrap Metal, food, fuel, and rare shells until your save proves they are spare.
How do I use the SAND loot finder?
Search the item name, filter by use or risk, save items you still need, and copy the decision note if you are planning a run with friends.
When is loot safe to sell?
Loot is safer to sell when it is not needed for delivery, crafting, research, ammo, Trampler readiness, or your next route.