Guides
SAND Raiders of Sophie Extraction Guide: Radio Tower & Storm Dive
Quick Answer
SAND Raiders of Sophie extraction is successful only when both the player and the Trampler leave. Start the exit plan once target cargo is on board, protect the walking base during radio tower calls, and abandon side loot when Storm Dive pressure turns the run against you.
Extraction Recovery
Fix The Moment Where Good Runs Die
Use this when loot is already on board and the real problem is the radio call, exit zone, Storm pressure, or Trampler position.The page turns the run from looting into leaving before cargo greed, damage, or Storm pressure wins.
Filter by radio call, Storm Dive, contract cargo, POI approach, or loot route to get a safer next move.
A personal escape is not enough if the walking base, target item, or delivery stack is still exposed.
Released Jun 22, 2026; exact routes can shift during Early Access.
Learn cargo, food, weapons, and extraction before pushing Storm Dive.
Expect busy routes, contested exits, and quick balance changes during the launch window.
Failure Recovery
When the exit plan breaks
If the target item or contract cargo is already on board, every extra crate is now an exit risk.
Personal loot can be replaced; losing the walking base turns one bad fight into a session reset.
Use the radio tower or exit route, watch approach lanes, and park deliberately instead of drifting into the zone.
Storm Dive loot is a bonus only after power, crew, and the exit timer are under control.
Exit Checks
Pick the exit problem, then protect the run
Use this when the run already has value on board: choose why leaving is hard, then follow the safe move before chasing another crate.
Search every extraction and route recovery check.
You reached the exit but one part of the run is still outside.
- Next move
- Put both the player and the walking base inside the extraction plan before the timer matters.
- Protect
- Do not jump out for one more crate after the exit is already open.
- Check before moving
- Approach, height, and retreat
You need the exit sequence instead of more loot.
- Next move
- Start the call, watch the approach lanes, then move the Trampler into the exit zone.
- Protect
- If enemy smoke or gunfire appears, leave loot behind and protect the vehicle.
- Check before moving
- Approach, height, and retreat
The run already has the target item or the Trampler is damaged.
- Next move
- Stop looting and turn the route into an exit problem.
- Protect
- Storm rewards are not worth losing the walking base, fuel reserve, or contract cargo.
- Check before moving
- Approach, height, and retreat
You are carrying delivery cargo or a timed objective.
- Next move
- Protect the delivery stack and leave when the objective is done.
- Protect
- Check height, approach, and retreat before committing the walking base.
- Check before moving
- 9.1 m
You are carrying delivery cargo or a timed objective.
- Next move
- Protect the delivery stack and leave when the objective is done.
- Protect
- Check height, approach, and retreat before committing the walking base.
- Check before moving
- 9.1 m
You are carrying delivery cargo or a timed objective.
- Next move
- Protect the delivery stack and leave when the objective is done.
- Protect
- Check height, approach, and retreat before committing the walking base.
- Check before moving
- 9.1 m
You are carrying delivery cargo or a timed objective.
- Next move
- Protect the delivery stack and leave when the objective is done.
- Protect
- Check height, approach, and retreat before committing the walking base.
- Check before moving
- 9.1 m
You are carrying delivery cargo or a timed objective.
- Next move
- Protect the delivery stack and leave when the objective is done.
- Protect
- Check height, approach, and retreat before committing the walking base.
- Check before moving
- 9.1 m
You are carrying delivery cargo or a timed objective.
- Next move
- Protect the delivery stack and leave when the objective is done.
- Protect
- Check height, approach, and retreat before committing the walking base.
- Check before moving
- 9.1 m
You are carrying delivery cargo or a timed objective.
- Next move
- Protect the delivery stack and leave when the objective is done.
- Protect
- Check height, approach, and retreat before committing the walking base.
- Check before moving
- 9.1 m
You are carrying delivery cargo or a timed objective.
- Next move
- Protect the delivery stack and leave when the objective is done.
- Protect
- Check height, approach, and retreat before committing the walking base.
- Check before moving
- 9.1 m
You are routing through a POI that can become an exit problem.
- Next move
- Scout the approach before driving the Trampler into a tight space.
- Protect
- Check height, approach, and retreat before committing the walking base.
- Check before moving
- 9.1 m
You are routing through a POI that can become an exit problem.
- Next move
- Scout the approach before driving the Trampler into a tight space.
- Protect
- Check height, approach, and retreat before committing the walking base.
- Check before moving
- 9.1 m
You are routing through a POI that can become an exit problem.
- Next move
- Scout the approach before driving the Trampler into a tight space.
- Protect
- Check height, approach, and retreat before committing the walking base.
- Check before moving
- 5.3 m
You are routing through a POI that can become an exit problem.
- Next move
- Scout the approach before driving the Trampler into a tight space.
- Protect
- Check height, approach, and retreat before committing the walking base.
- Check before moving
- 5.3 m
You are routing through a POI that can become an exit problem.
- Next move
- Scout the approach before driving the Trampler into a tight space.
- Protect
- Check height, approach, and retreat before committing the walking base.
- Check before moving
- 5.5 m
You are routing through a POI that can become an exit problem.
- Next move
- Scout the approach before driving the Trampler into a tight space.
- Protect
- Check height, approach, and retreat before committing the walking base.
- Check before moving
- 5.5 m
You need to leave with both the player and the walking base.
- Next move
- Clear the approach, park deliberately, and stop looting once the exit plan starts.
- Protect
- Check height, approach, and retreat before committing the walking base.
- Check before moving
- Approach, height, and retreat
You need to leave with both the player and the walking base.
- Next move
- Clear the approach, park deliberately, and stop looting once the exit plan starts.
- Protect
- Check height, approach, and retreat before committing the walking base.
- Check before moving
- Approach, height, and retreat
You are routing through a POI that can become an exit problem.
- Next move
- Scout the approach before driving the Trampler into a tight space.
- Protect
- Check height, approach, and retreat before committing the walking base.
- Check before moving
- 25.0 m
You are routing through a POI that can become an exit problem.
- Next move
- Scout the approach before driving the Trampler into a tight space.
- Protect
- Check height, approach, and retreat before committing the walking base.
- Check before moving
- 25.0 m
You are routing through a POI that can become an exit problem.
- Next move
- Scout the approach before driving the Trampler into a tight space.
- Protect
- Check height, approach, and retreat before committing the walking base.
- Check before moving
- 4.6 m
You are routing through a POI that can become an exit problem.
- Next move
- Scout the approach before driving the Trampler into a tight space.
- Protect
- Check height, approach, and retreat before committing the walking base.
- Check before moving
- 4.6 m
You are routing through a POI that can become an exit problem.
- Next move
- Scout the approach before driving the Trampler into a tight space.
- Protect
- Check height, approach, and retreat before committing the walking base.
- Check before moving
- 6.9 m
You are routing through a POI that can become an exit problem.
- Next move
- Scout the approach before driving the Trampler into a tight space.
- Protect
- Check height, approach, and retreat before committing the walking base.
- Check before moving
- 6.9 m
You are near a route start or recovery point.
- Next move
- Scout the approach before driving the Trampler into a tight space.
- Protect
- Check height, approach, and retreat before committing the walking base.
- Check before moving
- Approach, height, and retreat
You are near a route start or recovery point.
- Next move
- Scout the approach before driving the Trampler into a tight space.
- Protect
- Check height, approach, and retreat before committing the walking base.
- Check before moving
- Approach, height, and retreat
You need to leave with both the player and the walking base.
- Next move
- Clear the approach, park deliberately, and stop looting once the exit plan starts.
- Protect
- Check height, approach, and retreat before committing the walking base.
- Check before moving
- 6.3 m
You need to leave with both the player and the walking base.
- Next move
- Clear the approach, park deliberately, and stop looting once the exit plan starts.
- Protect
- Check height, approach, and retreat before committing the walking base.
- Check before moving
- 6.3 m
You need to leave with both the player and the walking base.
- Next move
- Clear the approach, park deliberately, and stop looting once the exit plan starts.
- Protect
- Check height, approach, and retreat before committing the walking base.
- Check before moving
- 9.0 m
You need to leave with both the player and the walking base.
- Next move
- Clear the approach, park deliberately, and stop looting once the exit plan starts.
- Protect
- Check height, approach, and retreat before committing the walking base.
- Check before moving
- 9.0 m
You are routing through a POI that can become an exit problem.
- Next move
- Scout the approach before driving the Trampler into a tight space.
- Protect
- Check height, approach, and retreat before committing the walking base.
- Check before moving
- 5.0 m
You are routing through a POI that can become an exit problem.
- Next move
- Scout the approach before driving the Trampler into a tight space.
- Protect
- Check height, approach, and retreat before committing the walking base.
- Check before moving
- 5.0 m
You found Coral Chunk or enough valuables to finish the run.
- Next move
- Use Valuables Safe or Valuables Container Tier 1 Premium Set 1 as a target, then leave once the cargo is loaded.
- Protect
- A coral run turns bad when the team chases one more safe after the contract item is already on board.
- Check before moving
- Approach, height, and retreat
No matching exit check. Clear the search or switch Exit problem back to all exit checks.
SAND: Raiders of Sophie extraction turns a good loot run into a real win only when both the player and the Trampler leave. Finding Black Box, Coral Chunk, rare ammo, or a valuable part is only the middle of the run. The end is getting both out without turning the exit into another greedy loot stop.
Last checked: June 30, 2026. Exact POI comfort, exit routes, and Storm Dive pressure can shift during Early Access. The rules below focus on repeatable extraction habits: stop widening the route, protect the walking base, and treat the exit sequence as the objective once target cargo is secure.
Quick Answer
Extract when the main cargo is on board, not when every nearby crate is empty. A good SAND extraction plan has four parts:
- The player is alive and near the exit plan.
- The Trampler can move, turn, and survive the approach.
- Contract or rare cargo is separated from sell cargo.
- The team has already agreed what gets abandoned if the exit gets messy.
If one of those is missing, stop looting and fix the exit.
Extraction Failure Recovery Flow
Use the tool above when a run starts bending. The flow is intentionally blunt because extraction failures usually come from delay, not mystery.
| Failure moment | What to do now | What to stop doing |
|---|---|---|
| Target cargo is secured | Start routing toward the exit | Checking one more side room |
| Radio tower call begins | Cover approach lanes and keep the Trampler ready to move | Parking lazily or splitting too far from the base |
| Storm Dive pressure rises | Cut the route short and bank what matters | Trying to justify the risk with future loot |
| Trampler is damaged or low on power | Leave with less cargo | Spending the last margin on another fight |
| Player inventory is full but cargo is disorganized | Sort only what affects extraction | Fine-tuning every sell item while exposed |
The key idea is simple: once the run has something worth keeping, the exit becomes the content. SAND rewards the player who can stop.
Player And Trampler Leave Together
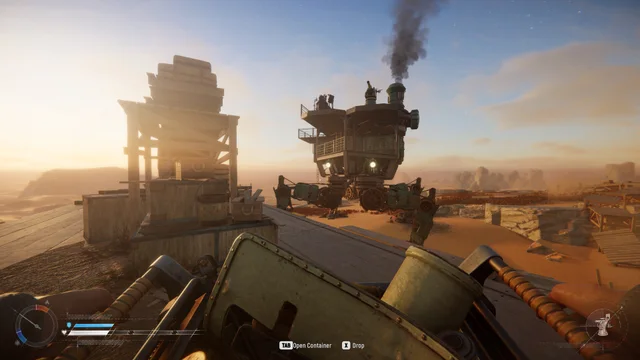
Many extraction games train players to think about the character first. SAND adds a bigger requirement: the walking base has to survive the decision too. If the player reaches safety but the Trampler is stranded, low on power, blocked, or getting shot apart, the run still went wrong.
Before committing to an exit, ask:
| Check | Why it matters |
|---|---|
| Is the Trampler facing a clean escape line? | A bad turn under pressure can waste the window |
| Is the player close enough to re-board or support? | Splitting too far makes one problem into two |
| Is cargo already loaded? | Last-second cargo transfers create panic |
| Is mounted ammo counted? | A turret with no shells changes the whole cover plan |
| Is there enough power margin? | A perfect route does not help if the base cannot move |
If the answer is no, do not begin the exit as if everything is fine. Fix the weak point or leave before the weak point becomes a loss.
Radio Tower Calls
Radio tower calls are where impatience shows. The call itself is not the entire problem; the approach and parking are the real test. A good call starts before the button is pressed.
Use this order:
- Clear the immediate approach.
- Park the Trampler with a clean forward route.
- Put contract or rare cargo where it will not be confused with sell loot.
- Start the call.
- Watch approach lanes instead of opening fresh containers.
- Move deliberately when the exit window is ready.
The wrong habit is pressing the call and then acting as if the route is still a loot route. If you are watching a timer, listening for enemies, and thinking about a new crate at the same time, the crate should lose.
Voyage Extraction
Voyage is the safer training route, but it still needs an exit rule. Beginners often lose Voyage runs because they treat safety as permission to stretch the route forever.
Good Voyage stop rules:
| Stop rule | Why it works |
|---|---|
| First contract item found | Teaches clean objective extraction |
| First rare material found | Banks progression without over-testing the route |
| One cargo lane full | Prevents messy inventory decisions near the exit |
| Food or ammo below comfort | Avoids paying a fight tax for weak cargo |
| Trampler movement feels awkward | Lets you fix the build before Storm Dive |
Voyage is where you practice leaving. A player who cannot leave Voyage cleanly should not expect Storm Dive to be forgiving.
Storm Dive Extraction
Storm Dive is where SAND starts asking sharper questions. The loot can be better, but the cost of staying wrong is higher. You should enter Storm Dive with a stronger stop rule than you use in Voyage, not a weaker one.
Storm Dive is worth continuing only when:
- The target is not yet secured.
- The Trampler still has power margin.
- Mounted weapons or personal ammo can handle one more fight.
- Cargo still has a clean lane for the main item.
- The exit route is still reachable without improvising through a bad position.
Storm Dive is no longer worth continuing when:
- The main target is on board.
- The Trampler is damaged or hard to turn.
- You are choosing between contract cargo and sell cargo.
- A fight would spend rare ammo for ordinary loot.
- The next stop is justified only by “maybe something better.”
That last reason is the quiet killer. “Maybe something better” is not a route. It is how a good run becomes a story about what you almost extracted.
When To Abandon Loot
Abandoning loot feels bad, but losing the Trampler feels worse. The right time to drop or ignore cargo is before the exit collapses, not after.
| Keep protecting | Abandon first |
|---|---|
| Contract cargo such as Black Box or delivery stacks | Common sell cargo |
| First-copy materials that feed crafting or Trampler progress | Duplicate low-pressure valuables |
| Food, fuel, and ammo needed to survive the exit | Loot that only matters after a safe return |
| The Trampler’s movement lane | Any crate that pulls the player away from the base |
Use the Loot Guide after a run to decide what should have been protected. During the exit, protect the run.
If the hold is messy during an exit, use visual recognition only for triage. Protect the obvious contract cargo, rare parts, food, fuel, ammo, and Trampler materials first. Do not stand exposed trying to price every similar-looking valuable; the detailed sell decision belongs after both the player and the walking base are safe.
Extraction Mistakes
| Mistake | Better habit |
|---|---|
| Calling extraction before the Trampler is positioned | Park first, call second |
| Looting during the exit sequence | Treat the exit as the objective |
| Keeping player and Trampler plans separate | Move them as one extraction problem |
| Waiting until Storm Dive forces the decision | Pick the stop rule before launch |
| Selling contract cargo after a successful run | Search the item before opening the shop |
What To Open Next
If your extraction problems come from poor packing, go back to the Beginner Guide and simplify the route. If the Trampler feels like the limit, open the Trampler Guide and check cargo, crew, power, mounted weapons, and short-route testing. If the run succeeded but the sell screen is now the dangerous part, use the Loot Guide before converting strange items into cash.
FAQ
How does extraction work in SAND Raiders of Sophie?
Plan extraction around both the player and the Trampler. The run is not secure if one is safe and the other is still exposed.
When should I extract in SAND?
Start leaving once the main target, contract cargo, or rare material is on board. If power, ammo, or Trampler health is falling, leave earlier.
Is Storm Dive worth staying longer for?
Only when the Trampler, crew, ammo, and exit route are still healthy. Storm rewards are not worth losing the walking base.
What should I do if extraction fails?
Stop looting, protect the Trampler, reset the approach, and abandon side cargo before risking the player or walking base.