Guides
SAND Raiders of Sophie Beginner Guide: First Voyage Route
Quick Answer
For your first SAND Raiders of Sophie run, choose Voyage, pack food, fuel, one simple weapon, matching ammo, one empty cargo lane, and a clear exit rule. Leave after the first useful objective instead of turning the route into a full-map loot sweep.
First Voyage Checklist
Know What To Pack Before The First Voyage
Use this when the question is not lore or item trivia, but whether your first route can launch, fight, carry cargo, and leave.The page helps you pack only what the route can support, then leave after the first useful target.
Mark launch basics, then search the starter loadout board so the weapon and ammo row agree.
After extraction, use the loot finder for parts, food, fuel, shells, and strange valuables.
Released Jun 22, 2026; exact routes can shift during Early Access.
Learn cargo, food, weapons, and extraction before pushing Storm Dive.
Expect busy routes, contested exits, and quick balance changes during the launch window.
Route Picker
What are you trying to finish?
learning the loop without betting the whole base
- Load food, fuel reserve, a simple gun, matching ammo, and one empty cargo lane.
- Use Voyage first so the run teaches looting, storage, and extraction before Storm pressure.
- Stop after the first useful objective or full cargo pocket.
- Extract the player and the Trampler together; do not turn the exit into another loot stop.
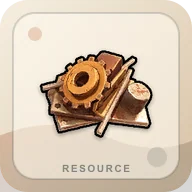
Black Box, Coral Chunk, Mechanical Parts, Threads, or delivery stacks
- Search the item in the finder before selling anything.
- Reserve cargo space for the delivery item before side loot.
- Once the target is on board, start routing toward extraction.
- If the Trampler is damaged or low on power, keep the contract item and leave the rest.
higher reward routes after the basic loop feels stable
- Bring more food, shells, repair margin, and a clearer exit rule than in Voyage.
- Treat smoke, distant engines, and a full cargo bay as reasons to leave.
- Keep the walking base moving; a parked Trampler is an easy target.
- Cut the run short once the objective is secured.
new chassis, cargo bay, turret deck, reactor, or crew layout
- Test one new system at a time instead of rebuilding the whole vehicle.
- Check cargo, power, crew seats, and turret ammo before leaving.
- Run a short route and come back before trusting the build with rare loot.
- Move to Storm only after the build survives a simple extraction.
Launch Check
First Voyage Checklist
Starter Loadout
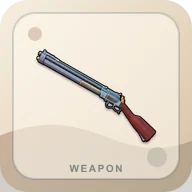
Pair weapons with the ammo you can actually replace
Use this before launching: pick a weapon row first, then keep the ammo rows that match that weapon.
Search the beginner-friendly weapon and ammo shortlist.
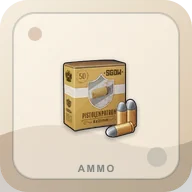
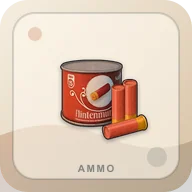
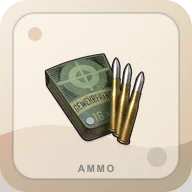
Pair it with 8x21mm Ammo before leaving camp.
- Match
- 8x21mm Ammo
- Run pressure
- Light reserve; useful for starter runs.
- Before launch
- Match the weapon to a known ammo reserve before the run starts.
Pair it with 8x21mm Ammo before leaving camp.
- Match
- 8x21mm Ammo
- Run pressure
- Light reserve; useful for starter runs.
- Before launch
- Match the weapon to a known ammo reserve before the run starts.
Pair it with 12-Gauge Ammo before leaving camp.
- Match
- 12-Gauge Ammo
- Run pressure
- Close fights spend fast.
- Before launch
- Match the weapon to a known ammo reserve before the run starts.
Pair it with 12 GA Ammo before leaving camp.
- Match
- 12 GA Ammo
- Run pressure
- Close fights spend fast.
- Before launch
- Match the weapon to a known ammo reserve before the run starts.
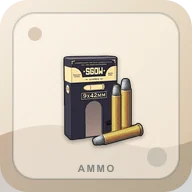
Pair it with 9x42mm Ammo before leaving camp.
- Match
- 9x42mm Ammo
- Run pressure
- Rifle reserve; good mid-range habit.
- Before launch
- Match the weapon to a known ammo reserve before the run starts.
Pair it with 9x42mm Ammo before leaving camp.
- Match
- 9x42mm Ammo
- Run pressure
- Rifle reserve; good mid-range habit.
- Before launch
- Match the weapon to a known ammo reserve before the run starts.
Pair it with 9x42mm Ammo before leaving camp.
- Match
- 9x42mm Ammo
- Run pressure
- Rifle reserve; good mid-range habit.
- Before launch
- Match the weapon to a known ammo reserve before the run starts.
Carry it only when the matching weapon is mounted or equipped.
- Match
- Check the weapon before launch
- Run pressure
- Light reserve; useful for starter runs.
- Before launch
- Carry enough for the weapon you actually brought; loose rare rounds are not a plan.

Carry it only when the matching weapon is mounted or equipped.
- Match
- Check the weapon before launch
- Run pressure
- Light reserve; useful for starter runs.
- Before launch
- Carry enough for the weapon you actually brought; loose rare rounds are not a plan.
Carry it only when the matching weapon is mounted or equipped.
- Match
- Check the weapon before launch
- Run pressure
- Rifle reserve; good mid-range habit.
- Before launch
- Carry enough for the weapon you actually brought; loose rare rounds are not a plan.

Carry it only when the matching weapon is mounted or equipped.
- Match
- Check the weapon before launch
- Run pressure
- Rifle reserve; good mid-range habit.
- Before launch
- Carry enough for the weapon you actually brought; loose rare rounds are not a plan.

Carry it only when the matching weapon is mounted or equipped.
- Match
- Check the weapon before launch
- Run pressure
- Check reserve before launch.
- Before launch
- Carry enough for the weapon you actually brought; loose rare rounds are not a plan.

Carry it only when the matching weapon is mounted or equipped.
- Match
- Check the weapon before launch
- Run pressure
- Close fights spend fast.
- Before launch
- Carry enough for the weapon you actually brought; loose rare rounds are not a plan.
Carry it only when the matching weapon is mounted or equipped.
- Match
- 12 GA Ammo
- Run pressure
- Close fights spend fast.
- Before launch
- Carry enough for the weapon you actually brought; loose rare rounds are not a plan.
Carry it only when the matching weapon is mounted or equipped.
- Match
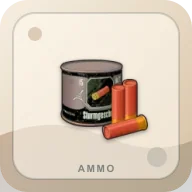
- 40mm Cannon Shell
- Run pressure
- Sustained fire; bring a deeper reserve.
- Before launch
- Carry enough for the weapon you actually brought; loose rare rounds are not a plan.
Carry it only when the matching weapon is mounted or equipped.
- Match
- 70mm Shotgun Cannon Shell
- Run pressure
- Single-shot pressure; do not waste on weak targets.
- Before launch
- Carry enough for the weapon you actually brought; loose rare rounds are not a plan.
Carry it only when the matching weapon is mounted or equipped.
- Match
- 80mm Cannon Shell
- Run pressure
- Heavy shells; count before every fight.
- Before launch
- Carry enough for the weapon you actually brought; loose rare rounds are not a plan.
Mount it only after the shell reserve is ready.
- Match
- Check the weapon before launch
- Run pressure
- Mounted ammo pressure.
- Before launch
- Match the weapon to a known ammo reserve before the run starts.
Carry it only when the matching weapon is mounted or equipped.
- Match
- Check the weapon before launch
- Run pressure
- Close fights spend fast.
- Before launch
- Carry enough for the weapon you actually brought; loose rare rounds are not a plan.
Carry it only when the matching weapon is mounted or equipped.
- Match
- Check the weapon before launch
- Run pressure
- Close fights spend fast.
- Before launch
- Carry enough for the weapon you actually brought; loose rare rounds are not a plan.
Carry it only when the matching weapon is mounted or equipped.
- Match
- Check the weapon before launch
- Run pressure
- Close fights spend fast.
- Before launch
- Carry enough for the weapon you actually brought; loose rare rounds are not a plan.
Carry it only when the matching weapon is mounted or equipped.
- Match
- Check the weapon before launch
- Run pressure
- Close fights spend fast.
- Before launch
- Carry enough for the weapon you actually brought; loose rare rounds are not a plan.
Carry it only when the matching weapon is mounted or equipped.
- Match
- Check the weapon before launch
- Run pressure
- Close fights spend fast.
- Before launch
- Carry enough for the weapon you actually brought; loose rare rounds are not a plan.
Carry it only when the matching weapon is mounted or equipped.
- Match
- Check the weapon before launch
- Run pressure
- Close fights spend fast.
- Before launch
- Carry enough for the weapon you actually brought; loose rare rounds are not a plan.
No matching starter item. Clear the search or switch Need back to all loadout checks.
Loot Finder
Keep, sell, deliver, or craft?
Use this at storage or the sell screen: search the item, choose the decision you are making, then save anything that should not become cash yet.
Search every visible cargo decision in this tool.
Turn a weird coral find into progress instead of loose cash.
- Next move
- Keep the first stack, then decide between Coral Dust, Mechanical Parts, or a contract hand-in.
- Do not regret
- Do not sell the last Coral Chunk until the current route, contract, and workbench need are clear.
- Useful when
- Coral runs, early contracts, and resource conversion.
- Route hint
- Check valuables safes and coral routes, then extract before the cargo run gets greedy.
- Delivery
- 50 x Coral Chunk -> 1000 x Crowns -> 20 crowns per item
- Craft use
- Coral Dust, Mechanical Parts, Coral Dust
- Likely stop
- Valuables Safe, Valuables Container Tier 1 Premium Set 1, Valuables Container Tier 1 Premium Set 2
Decide whether Fabric Scraps should be delivered before it becomes cash.
- Next move
- Hold the delivery amount, check the timer if listed, then extract instead of widening the run.
- Do not regret
- Separate contract cargo from sell cargo before opening the shop or hand-in screen.
- Useful when
- Delivery runs and clean extraction planning.
- Route hint
- Reserve the delivery stack, then leave once the cargo is secure. Reward: 1000 x Crowns.
- Delivery
- 250 x Fabric Scraps -> 1000 x Crowns -> 4 crowns per item
- Craft use
- Fabric, Fabric, 12 GA Ammo
- Likely stop
- Crate of Shells, Shells Container Tier 1 Premium Set 1, Shells Container Tier 1 Premium Set 2

Feed early ammunition and basic weapons.
- Next move
- Keep a starter craft reserve, then sell only surplus after the ammo box is healthy.
- Do not regret
- Check ammo needs before turning Scrap Metal into cash.
- Useful when
- First Voyage ammo, cheap weapons, and workbench recovery.
- Route hint
- Parts crates and starter looting loops are the safest early route.
- Delivery
- 250 x Scrap Metal -> 1000 x Crowns -> 4 crowns per item
- Craft use
- 8x21 mm Ammo, 11x54 mm Ammo, 8x21 mm Ammo
- Likely stop
- Parts Crate, Parts Crate
Turn junk rounds into usable ammunition.
- Next move
- Save it for 8x21mm, 9x42mm, 12 GA, and turret shell crafting before selling.
- Do not regret
- If your guns are underfed, keep Scrapped Ammo out of the sell pile.
- Useful when
- Loadout recovery and post-fight restock.
- Route hint
- Loot crates, extract, then craft ammo in batches that match your actual weapons.
- Delivery
- 250 x Scrapped Ammo -> 1000 x Crowns -> 4 crowns per item
- Craft use
- 8x21 mm Ammo, 12 GA Ammo, 70 mm Shell
- Likely stop
- Weapon Crate, Weapon Crate
Decide whether Threads should be delivered before it becomes cash.
- Next move
- Hold the delivery amount, check the timer if listed, then extract instead of widening the run.
- Do not regret
- Separate contract cargo from sell cargo before opening the shop or hand-in screen.
- Useful when
- Delivery runs and clean extraction planning.
- Route hint
- Reserve the delivery stack, then leave once the cargo is secure. Reward: 1000 x Mechanical Parts.
- Delivery
- 250 x Threads -> 1000 x Mechanical Parts
- Craft use
- Fabric, Fabric, Old Smuggler's Jacket
- Likely stop
- Food Crate, Food Container Tier 1 Premium Set 1, Food Container Tier 2 Premium Set 1
Decide whether Mechanical Parts should be delivered before it becomes cash.
- Next move
- Hold the delivery amount, check the timer if listed, then extract instead of widening the run.
- Do not regret
- Separate contract cargo from sell cargo before opening the shop or hand-in screen.
- Useful when
- Delivery runs and clean extraction planning.
- Route hint
- Reserve the delivery stack, then leave once the cargo is secure. Reward: 200 x Pneumatic Parts.
- Delivery
- 1000 x Mechanical Parts -> 200 x Pneumatic Parts
- Likely stop
- Parts Crate, Suspicious Pile of Sand, Buried Treasure Tier 1 Set 1
Use 12 GA Ammo as a crafting input instead of loose cargo.
- Next move
- Keep enough for 12 GA Shotgun Slug; sell only the surplus.
- Do not regret
- Keep a reserve stack in one known storage spot.
- Useful when
- Crafting 12 GA Shotgun Slug.
- Route hint
- Start with Suspicious Pile of Sand or Weapon Crate and stop when cargo space or exit safety gets tight.
- Craft use
- 12 GA Shotgun Slug
- Likely stop
- Suspicious Pile of Sand, Weapon Crate, Buried Treasure Tier 1 Set 4
Use EB Zseb Revolver as a crafting input instead of loose cargo.
- Next move
- Keep enough for EB "Bantam" Revolver and EB "Bantam" Revolver; sell only the surplus.
- Do not regret
- Keep a reserve stack in one known storage spot.
- Useful when
- Crafting EB "Bantam" Revolver or EB "Bantam" Revolver.
- Route hint
- Start with Weapon Crate or Buried Treasure Tier 2 Set 4 and stop when cargo space or exit safety gets tight.
- Craft use
- EB "Bantam" Revolver, EB "Bantam" Revolver
- Likely stop
- Weapon Crate, Buried Treasure Tier 2 Set 4, Ghoul Range Set 4

Use Fabric as a crafting input instead of loose cargo.
- Next move
- Keep enough for Time Bomb and HG-6 Contact Grenade; sell only the surplus.
- Do not regret
- Keep a reserve stack in one known storage spot.
- Useful when
- Crafting Time Bomb or HG-6 Contact Grenade.
- Route hint
- Start with Medical Container Tier 2 Premium Set 1 or Medical Container Tier 3 Premium Set 1 and stop when cargo space or exit safety gets tight.
- Craft use
- Time Bomb, HG-6 Contact Grenade, Armor-Piercing Rocket
- Likely stop
- Medical Container Tier 2 Premium Set 1, Medical Container Tier 3 Premium Set 1, Medical Container Tier 2 Basic Set 1
Handle a high-value objective without losing the payout.
- Next move
- Treat it as a contract item first, then extract cleanly before chasing side loot.
- Do not regret
- If the run already has a Black Box, stop widening the route and plan the exit.
- Useful when
- Timed contracts and focused extraction runs.
- Route hint
- Run the objective, secure the box, and leave room for a failed extraction reset.
- Delivery
- 1 x Black Box -> 2000 x Crowns -> 2000 crowns per item
- Craft use
- Computing Module, Computing Module, Computing Module

Decide whether Scrapped Ammunition should be delivered before it becomes cash.
- Next move
- Hold the delivery amount, check the timer if listed, then extract instead of widening the run.
- Do not regret
- Separate contract cargo from sell cargo before opening the shop or hand-in screen.
- Useful when
- Delivery runs and clean extraction planning.
- Route hint
- Reserve the delivery stack, then leave once the cargo is secure. Reward: 1000 x Crowns.
- Delivery
- 250 x Scrapped Ammunition -> 1000 x Crowns -> 4 crowns per item
- Likely stop
- Weapons Container Tier 1 Premium Set 1, Weapons Container Tier 1 Premium Set 2, Weapons Container Tier 1 Premium Set 3

Protect Time Bomb until the unlock path is clear.
- Next move
- Check Tier II before spending this item elsewhere.
- Do not regret
- Check the unlock path before spending the last copy.
- Useful when
- Workbench restock and route prep.
- Route hint
- Start with Suspicious Pile of Sand or Suspicious Pile of Sand and stop when cargo space or exit safety gets tight.
- Likely stop
- Suspicious Pile of Sand, Suspicious Pile of Sand
Use Alloy Steel as a crafting input instead of loose cargo.
- Next move
- Keep enough for Pristine 40 mm Autocannon Kit and Pristine 40 mm Autocannon Kit; sell only the surplus.
- Do not regret
- Keep a reserve stack in one known storage spot.
- Useful when
- Crafting Pristine 40 mm Autocannon Kit or Pristine 40 mm Autocannon Kit.
- Route hint
- Start with Ironclad Loot Box or Ironclad Alloy Loot Box and stop when cargo space or exit safety gets tight.
- Craft use
- Pristine 40 mm Autocannon Kit, Pristine 40 mm Autocannon Kit, Pristine 80 mm Naval Cannon Kit
- Likely stop
- Ironclad Loot Box, Ironclad Alloy Loot Box, Ironclad Loot Box
Use Gunpowder as a crafting input instead of loose cargo.
- Next move
- Keep enough for Time Bomb and HG-6 Contact Grenade; sell only the surplus.
- Do not regret
- Keep a reserve stack in one known storage spot.
- Useful when
- Crafting Time Bomb or HG-6 Contact Grenade.
- Route hint
- Start with Resource Container Tier 2 Premium Set 1 or Resource Container Tier 2 Premium Set 2 and stop when cargo space or exit safety gets tight.
- Craft use
- Time Bomb, HG-6 Contact Grenade, Armor-Piercing Rocket
- Likely stop
- Resource Container Tier 2 Premium Set 1, Resource Container Tier 2 Premium Set 2, Resource Container Tier 3 Premium Set 1
Use High Grade Gunpowder as a crafting input instead of loose cargo.
- Next move
- Keep enough for 11x54 mm Ammo and 11x54 mm Ammo; sell only the surplus.
- Do not regret
- Keep a reserve stack in one known storage spot.
- Useful when
- Crafting 11x54 mm Ammo or 11x54 mm Ammo.
- Route hint
- Start with Resource Container Tier 3 Premium Set 1 or Resource Container Tier 3 Premium Set 2 and stop when cargo space or exit safety gets tight.
- Craft use
- 11x54 mm Ammo, 11x54 mm Ammo
- Likely stop
- Resource Container Tier 3 Premium Set 1, Resource Container Tier 3 Premium Set 2, Resource Container Tier 3 Standard Set 1
Use Metal Rods as a crafting input instead of loose cargo.
- Next move
- Keep enough for M82 Rifle and Blitz 10R Pistol; sell only the surplus.
- Do not regret
- Keep a reserve stack in one known storage spot.
- Useful when
- Crafting M82 Rifle or Blitz 10R Pistol.
- Route hint
- Start with Shells Container Tier 2 Premium Set 1 or Shells Container Tier 2 Premium Set 2 and stop when cargo space or exit safety gets tight.
- Craft use
- M82 Rifle, Blitz 10R Pistol, Pepper Mill Shotgun
- Likely stop
- Shells Container Tier 2 Premium Set 1, Shells Container Tier 2 Premium Set 2, Shells Container Tier 2 Premium Set 3

Use Optic Lenses as a crafting input instead of loose cargo.
- Next move
- Keep enough for 1874s Petros Sniper Rifle and 1874s/sd Petros Sniper Rifle (Silenced); sell only the surplus.
- Do not regret
- Keep a reserve stack in one known storage spot.
- Useful when
- Crafting 1874s Petros Sniper Rifle or 1874s/sd Petros Sniper Rifle (Silenced).
- Route hint
- Start with Medical Container Tier 3 Premium Set 1 or Medical Container Tier 3 Standard Set 1 and stop when cargo space or exit safety gets tight.
- Craft use
- 1874s Petros Sniper Rifle, 1874s/sd Petros Sniper Rifle (Silenced), 1874s Petros Sniper Rifle
- Likely stop
- Medical Container Tier 3 Premium Set 1, Medical Container Tier 3 Standard Set 1, Ghoul Melee Set 4

Use Pneumatic Parts as a crafting input instead of loose cargo.
- Next move
- Keep enough for Pristine 40 mm Autocannon Kit and Pristine 40 mm Autocannon Kit; sell only the surplus.
- Do not regret
- Keep a reserve stack in one known storage spot.
- Useful when
- Crafting Pristine 40 mm Autocannon Kit or Pristine 40 mm Autocannon Kit.
- Route hint
- Start with Parts Crate or Suspicious Pile of Sand and stop when cargo space or exit safety gets tight.
- Craft use
- Pristine 40 mm Autocannon Kit, Pristine 40 mm Autocannon Kit, Pristine 80 mm Naval Cannon Kit
- Likely stop
- Parts Crate, Suspicious Pile of Sand, Buried Treasure Tier 1 Set 1
Move from found guns into planned loadouts.
- Next move
- Save enough for early weapon crafting before selling or scattering parts across storage.
- Do not regret
- Keep one stack in a known storage spot until the Armament route is stable.
- Useful when
- Upgrading personal weapons after safer Voyage runs.
- Route hint
- Farm weapons crates and parts crates, then craft only around the next route.
- Craft use
- M82 Rifle, Blitz 10R Pistol, M82 Rifle
- Likely stop
- Ironclad Loot Box, Ironclad Loot Box 40mm Set 1, Ironclad Loot Box 40mm Set 2
Protect MedKit until the unlock path is clear.
- Next move
- Check Tier I before spending this item elsewhere.
- Do not regret
- Check the unlock path before spending the last copy.
- Useful when
- Targeted loot routes and cargo decisions.
- Route hint
- Start with Medical Cabinet or Suspicious Pile of Sand and stop when cargo space or exit safety gets tight.
- Likely stop
- Medical Cabinet, Suspicious Pile of Sand, Medical Cabinet

Keep the crew alive during longer dune routes.
- Next move
- Carry enough for the route and refill the Trampler before Storm Dive.
- Do not regret
- Do not convert or sell every food item before a long extraction attempt.
- Useful when
- Beginner runs, long looting loops, and crew recovery.
- Route hint
- Food crates and safe starter routes are enough for early sessions.
- Likely stop
- Food Crate, Ironclad Loot Box, Suspicious Pile of Sand
Use Canned Sea Deer XL as a crafting input instead of loose cargo.
- Next move
- Keep enough for Canned Food and Canned Food; sell only the surplus.
- Do not regret
- Keep a reserve stack in one known storage spot.
- Useful when
- Crafting Canned Food or Canned Food.
- Route hint
- Keep enough for Canned Food and Canned Food before treating extras as money.
- Craft use
- Canned Food, Canned Food
Craft or restock Computing Module only when the next route needs it.
- Next move
- Craft it when the route needs it now, not just because the workbench allows it.
- Do not regret
- Keep one copy until the current save proves it is safe to spend.
- Useful when
- Workbench restock and route prep.
- Route hint
- Start with Ironclad Loot Box or Buried Treasure Tier 2 Set 2 and stop when cargo space or exit safety gets tight.
- Likely stop
- Ironclad Loot Box, Buried Treasure Tier 2 Set 2, Ironclad Loot Box 40mm Set 3
Craft or restock Coral Dust only when the next route needs it.
- Next move
- Craft it when the route needs it now, not just because the workbench allows it.
- Do not regret
- Keep one copy until the current save proves it is safe to spend.
- Useful when
- Workbench restock and route prep.
- Route hint
- Start with Food Container Tier 2 Premium Set 2 or Food Container Tier 3 Premium Set 1 and stop when cargo space or exit safety gets tight.
- Likely stop
- Food Container Tier 2 Premium Set 2, Food Container Tier 3 Premium Set 1, Food Container Tier 2 Basic Set 2
Keep the walking base powered and ready to leave.
- Next move
- Carry a reserve before adding extra loot weight or taking a longer route.
- Do not regret
- Refill before leaving camp; an empty Trampler turns a good run into a rescue problem.
- Useful when
- Every Trampler route, especially solo play.
- Route hint
- Check power before loot. Leave with less cargo rather than less movement.
- Likely stop
- Ironclad Loot Box, Parts Crate, Suspicious Pile of Sand
Feed the right weapon before the next fight or extraction push.
- Next move
- Target Buried Treasure Tier 1 Set 5 or Buried Treasure Tier 2 Set 5 and leave once the main cargo is loaded.
- Do not regret
- Bring enough for the planned fight, then leave rare surplus at base.
- Useful when
- Targeted loot routes and cargo decisions.
- Route hint
- Start with Buried Treasure Tier 1 Set 5 or Buried Treasure Tier 2 Set 5 and stop when cargo space or exit safety gets tight.
- Likely stop
- Buried Treasure Tier 1 Set 5, Buried Treasure Tier 2 Set 5, Weapons Container Tier 3 Premium Set 8
No matching item. Clear search, widen the use filter, or save the item until the current save proves it is spare cargo.
The best SAND: Raiders of Sophie beginner guide route is a short Voyage with one target, one safe exit rule, and no attempt to solve the whole game on day one. Pack food, fuel, a simple weapon, matching ammo, and an empty cargo lane. Loot until you have one useful objective or enough cargo to make choices awkward, then extract the player and the Trampler together.
Last checked: June 30, 2026. SAND is in Early Access, so exact item values and balance can move. The beginner route below is built around habits that stay useful: pack deliberately, avoid last-copy selling, stop widening the route once the target is secure, and test Trampler changes on short runs.
Quick First Voyage Route
| Step | Do this | Do not do this |
|---|---|---|
| 1 | Choose Voyage and decide the run goal before launch | Pick Storm Dive because it sounds more rewarding |
| 2 | Pack food, fuel, one weapon, matching ammo, and empty cargo | Bring mismatched guns and rare rounds with no plan |
| 3 | Loot one target lane: food, parts, valuables, or contract cargo | Open every side stop after the first good find |
| 4 | Start exit planning when the target is on board | Wait until the Trampler is damaged or cargo is full |
| 5 | Sort loot after extraction with the finder open | Sell strange items only because the hold is messy |
The point is not to leave with nothing. The point is to leave with a route you understand. A short successful Voyage teaches more than a long failed route because you get to see the full loop: launch, loot, load, extract, sort, upgrade, repeat.
First Voyage Checklist
The checklist above saves progress in your browser. Use it before launch, then reset it when you want to plan a fresh run.
| Check | Why it matters |
|---|---|
| Route goal picked | SAND punishes vague routes. “Find one contract item” is safer than “grab anything useful.” |
| Food or healing carried | Longer looting loops turn bad quickly when the crew has no recovery margin. |
| Power reserve checked | The Trampler is the run. If it cannot move, cargo and personal loot stop mattering. |
| Matching ammo loaded | A stronger weapon without reserve ammo is a false comfort. |
| Empty cargo lane saved | Contract cargo and rare materials need a clean place to land. |
| Exit rule chosen | Decide what makes you leave before loot starts feeling exciting. |
If fewer than four checks are ready, run very short or do not launch. If six or more are ready, Voyage is reasonable. Save Storm Dive until you can pack without thinking and can leave without arguing with yourself over one more crate.
What To Pack First
Your first loadout should be boring on purpose. Boring means it can be replaced, fed, and understood.
| Slot | Beginner pick | Reason |
|---|---|---|
| Food / healing | Canned Food, Food Can, MedKit, or whatever your save can spare | Keeps a learning route from ending because one small mistake snowballed |
| Power | NZ Mk2 Energy Rod or the fuel reserve your Trampler needs | A powered Trampler can correct bad parking, bad fights, and bad routes |
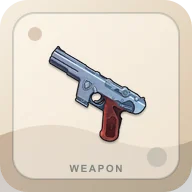
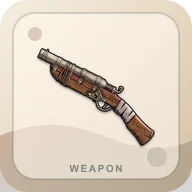
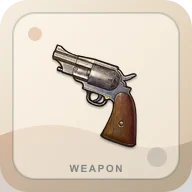
| Weapon | A pistol, revolver, rifle, or shotgun you can feed | Matching ammo matters more than rarity on the first route |
| Ammo | 8x21mm, 9x42mm, 12 GA, or the rounds your weapon actually uses | Loose rare ammo is cargo until it matches a weapon |
| Cargo | One empty lane for the target item | Prevents contract cargo from being dropped because sell loot filled every slot |
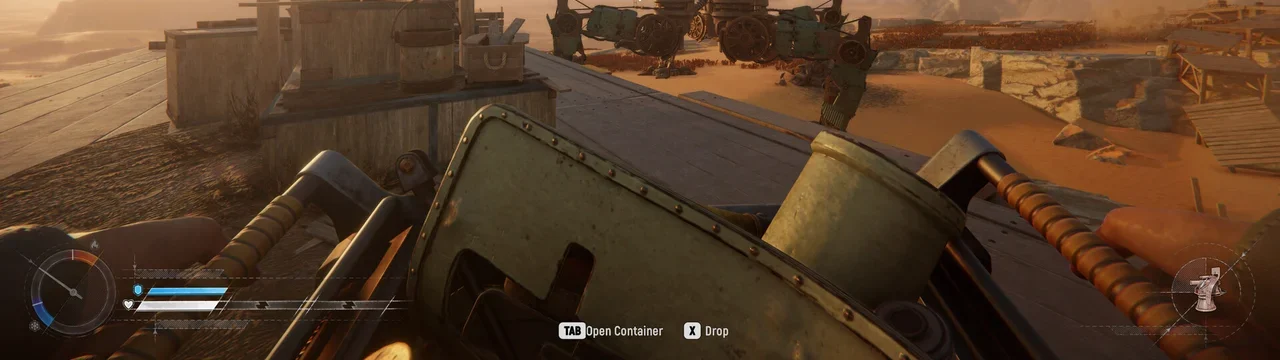
Do not bring four weapons because the names look exciting. Bring one weapon you understand, enough ammo to use it, and a plan for what happens if the fight is not worth taking.
Use the loadout images as a quick mismatch check before launch. If the weapon picture, ammo name, and ammo reserve do not line up, simplify the kit. A plain sidearm with a real stack of matching rounds is safer than a better-looking gun that turns into dead cargo after the first fight.
A Simple Loot Priority
For the first Voyage, sort loot by what it does for the next run:
| Priority | Examples | Beginner decision |
|---|---|---|
| Keep first | Black Box, Coral Chunk, Mechanical Parts, Pneumatic Parts, Threads, Weapon Parts | Store before selling unless the current save proves they are spare |
| Route support | Canned Food, MedKit, energy rods, ammo ingredients | Keep enough to launch the next run safely |
| Craft reserve | Scrap Metal, Scrapped Ammo, Fabric Scraps, Gunpowder | Save a starter stack before converting extras into cash |
| Safe cash | Small Valuables, surplus common valuables | Sell only after contract and crafting pressure is clear |
This is why the Loot Guide matters even for beginners. The early sell screen is dangerous because cash feels like progress, but some items are progress only when they stay in storage.
When you return from the first Voyage, sort by recognition first: contract-looking cargo, technical parts, ammo inputs, food, fuel, and strange valuables should all get a pause. The finder images help you spot those items quickly, but the final call should still come from the keep, craft, delivery, and safe-move notes.
When To Leave
Leave earlier than your inventory wants you to. SAND teaches you to think like an extraction player and a base manager at the same time. The player may feel strong, but the Trampler might be badly parked, low on power, short on shells, or carrying cargo you cannot replace.
Good beginner stop rules:
- The contract item is on board.
- The first rare material is on board.
- Cargo is forcing you to choose between useful items.
- Food or healing is below comfort.
- Ammo is low enough that the next fight would be expensive.
- The Trampler is damaged, stuck, or awkwardly positioned.
- You have learned the route and want to bank the lesson.
Do not wait for a perfect hold. A perfect hold that dies at extraction is not a perfect hold.
First Extraction Habit
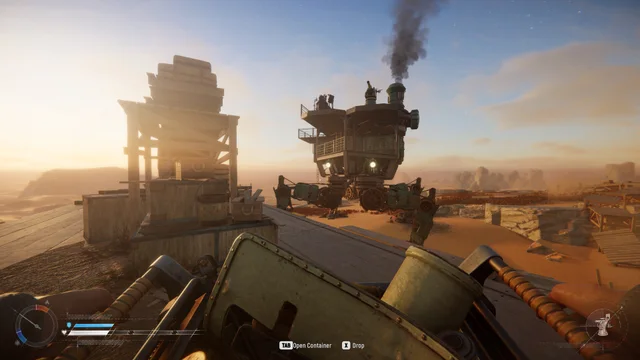
The first time an exit opens, treat it as the main objective. Clear the approach, move the Trampler deliberately, and stop jumping out for side loot. Extraction in SAND is not just the player crossing a line; the walking base also needs to make it out. If you are thinking, “one more crate,” ask whether that crate is worth the Trampler.
If a radio tower call or exit zone gets messy, open the Extraction Guide next. It focuses on the part most beginners underestimate: recovering when the exit plan breaks.
Beginner Mistakes To Avoid
| Mistake | Better move |
|---|---|
| Selling every odd item after the run | Search the item, keep first copies, and sell only surplus |
| Entering Storm Dive before Voyage is clean | Use Voyage until packing, cargo, and exits are boring |
| Rebuilding the whole Trampler after one run | Change one system, test short, then decide if it helped |
| Carrying rare ammo without a matching weapon | Match ammo to a real loadout or leave it stored |
| Looting after the exit plan starts | Protect the player, cargo, and Trampler instead |
What To Open Next
Open the Extraction Guide once your first route ends at the exit more often than at the loot stop. Open the Trampler Guide before adding cargo bays, engines, reactors, crew space, or turrets. Open the Loot Guide every time a rare item, contract item, ammo input, or crafting part is sitting in the hold and the sell screen is open.
The beginner goal is not mastery. The beginner goal is a repeatable loop: launch with a plan, loot one target, extract cleanly, protect important items, and make one Trampler or loadout improvement before the next route.
FAQ
What mode should I play first in SAND Raiders of Sophie?
Start with Voyage. It teaches cargo, food, ammo, the Trampler, and extraction before Storm Dive adds heavier pressure.
What should I bring on my first SAND run?
Bring food or healing, a fuel reserve, one simple weapon, matching ammo, and empty cargo space for the main target.
When should I leave my first Voyage?
Leave after the first useful objective, contract item, or full safe cargo lane. Do not turn the exit into another loot stop.
Should I sell everything after the first run?
No. Search rare-looking items first, and keep the first copy when the item may feed contracts, crafting, ammo, research, or Trampler upgrades.